Why Learn How to Draw and Rotate the Head
Faces are hard to draw, especially when you are trying to capture a face that isn’t straight on or from the side. The angles, the distorted proportions, the awkward shapes. Today we are going to walk you through the process with just a few easy steps.
In this article, you’ll learn:
- How to Draw the Head
- Finding Feature Lines
- Rotating the Head
Start with Circles and Build Spheres
While studying how to draw heads, you’ll be working on learning all of the different views of the head at once. You will see how simple it is, and with a little practice, you’ll be able to draw the head at any angle.
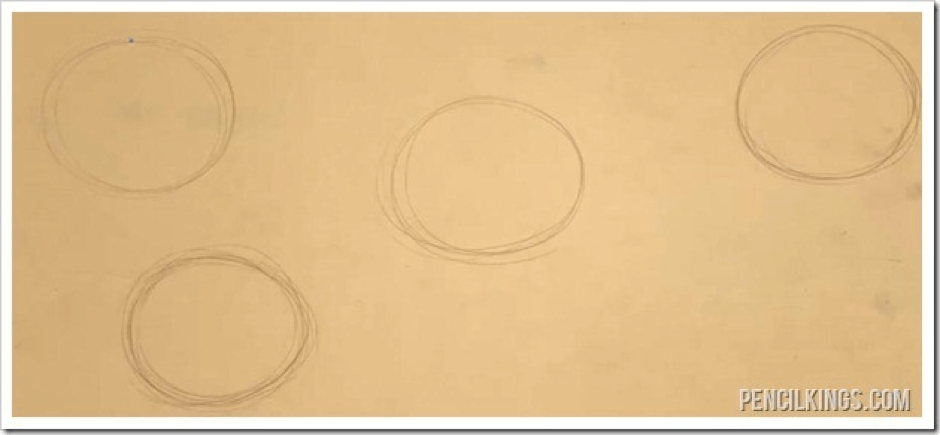
The circle is the building block that is going to drive everything else. While you are drawing circles, which are flat shapes, keep in mind that the head has depth, so we need to be able to show this in our work.
The next step is to draw the lines to divide the sphere into half-sections. You can draw in these guide lines lightly because you’ll want to erase them once the proportions and placement have been established.
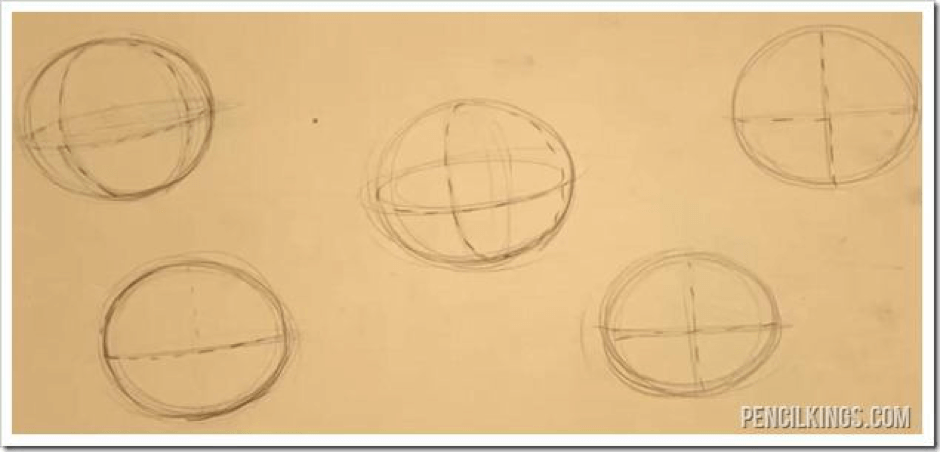
You need to draw guide lines that go around the sphere to help us see its 3D shape. You will divide it into 8 quarters by drawing around the shape vertically, horizontally, and from side to side.
One way to think of these guidelines is if you have an orange. When you cut that orange in half you create two pieces. We can consider this our vertical cut.
Then you have to make another cut through the orange but this time we are going to go across horizontally. We have four large pieces.
Finally, we need to turn the orange and cut through the four pieces. This cut will give you eight even pieces.
Using these lines helps us understand the 3D space on our flat paper. We need to convince the rest of the world that these objects are indeed three dimensional and seeing it and manipulating it is the first thing you need to understand.
It’s a little tricky to explain with words, but when you take a look at this found below I think you’ll understand how this works.
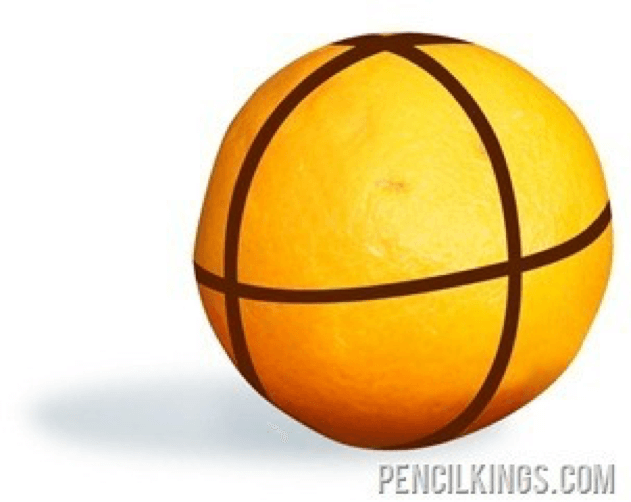
The trick here is to be able to draw these guides from your mind, and it’s not the easiest thing to do. Just keep practicing, and if it helps you could even get an orange or a ping pong ball and then draw in the guide lines so that you can look at it from all angles.
Remember that your understanding of objects as having depth and dimension is going to always play a big part in making what you draw appear three dimensional and not too flat.
Flatten the Sides of the Spheres
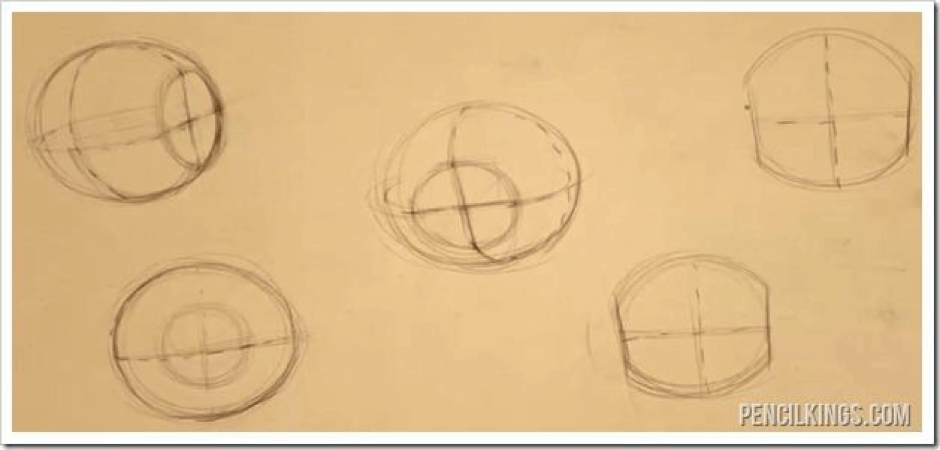
In order to eventually attach the ears to the head, we need a place to put them. If you haven’t noticed, the sides of a person’s head aren’t round. Not like the orange. So, we need to change this sphere so it isn’t so… round! So, we need to flatten the sides. If you think back to the orange – to get the desired effect you’ll just be cutting off a bit from either side of the orange.
Look at the right two examples on our reference, we are looking at the face from the front. You can see how the sides have been shed, this will be useful later. From the side shedding those ends don’t make much of a difference, but if we look at the three-quarter view at the top right, it affects the whole shape that we draw.
The horizontal line that cuts the sphere in half, is the line that shows where the eyebrows will be placed on the face. So this is an important line to keep in mind as we continue to break down the face to see where the facial features will be placed.
ASSIGNMENT
To try and understand this shape, all you need is a Styrofoam sphere. We will be creating an example that you can study from all angles so you know exactly what the shape should look like before you start drawing.

In step one and two, you will draw a centerline around the whole sphere both vertically and horizontally.
Next, looking at the face of the ball, in step two and three, we will be removing both sides to flatten them so that the ears can be added when we construct the face.
Lastly, in five and six, you will draw both a horizontal and vertical line along both of the flattened sides that line up with the previous lines, and you’ve got your physical reference that you can rotate and use when drawing the head.
Dividing the Front of the Face
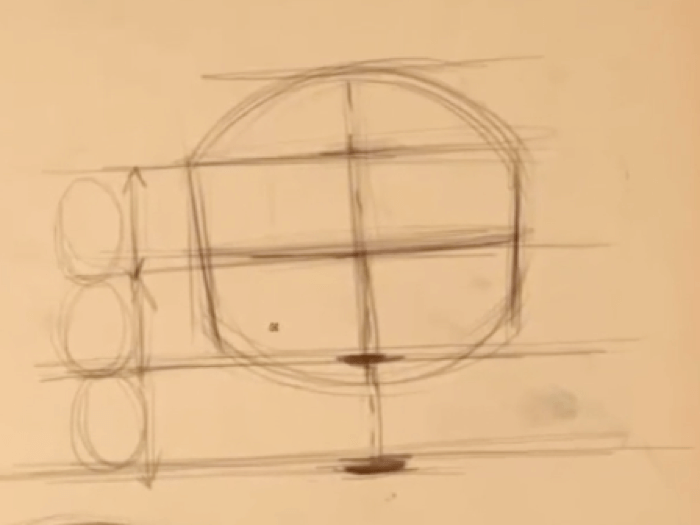
The hairline is an important place to mark early on. This will basically look the same in both the side or front view. The forehead will take up about two-thirds of the space above the brow line.
The space between the hairline and the brow line, aka the forehead, is an important measurement. We will be duplicating this length twice. When we duplicate its length once, it indicates where the nose will be, while the second shows us where the chin will end.
We end up with four divisions down the front of the face. The area where the hair will be, next is where the brows will be, the third is where the nose will sit, and the last line is for the chin.
Adding the Jaw Line
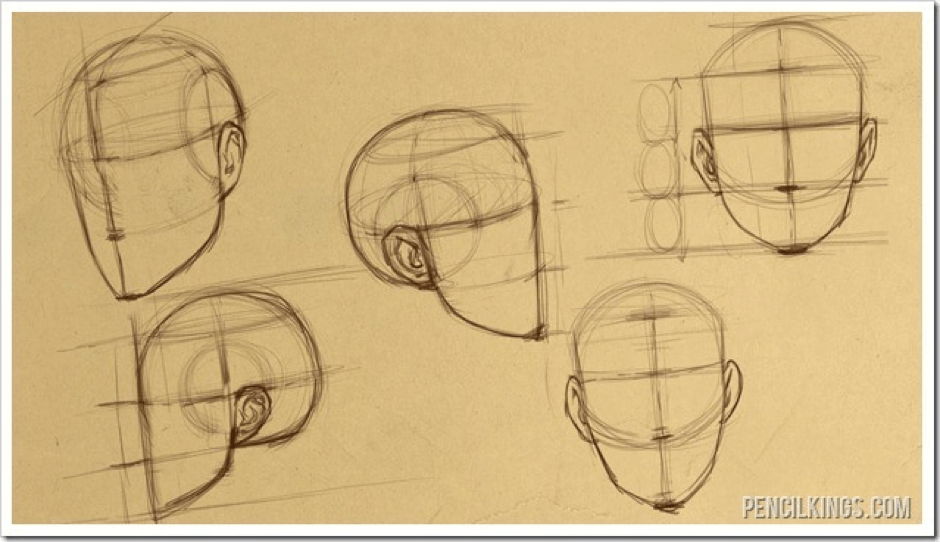
By adding the jaw-line we will be completing the basic steps for drawing and rotating the head.
With this simple system, you’ll be able to look at a head in any direction using a sphere and estimate exactly where the features of the face should be. Using the dividing lines we can establish the 8 pieces of the head and use it to indicate the direction the face is pointing towards.
Once we have the direction, we extend the face another two-thirds using the height of the forehead, and the position of the features will be ready and set to start drawing the features.
*The ears will be discussed in another post.
ASSIGNMENT
At this point, we need to practice! That means you will be creating 100 spheres, and use the steps above to figure out the size and direction of the head to then mark where the features will sit in each example. I hope you have fun learning!