
Take a look at the finished painting in this series on how to paint fantasy art
Ready to learn more about how to paint fantasy art?
In the previous lesson, Sycra Yasin showed you how to apply layer after layer of subtle blends and hues to Alice’s face to give your digital painting a professional feel.
Now, you’re going to take what you’ve learned and apply this to the rest of the body, building up areas of shadows and color value to make your painting really stand out.
Remember – there are no lines to worry about here, just layers of subtle variation that add depth to your finished artwork.
When blending the shadows and learning how to paint fantasy art, remember to leave some hard edges intact to create visual interest and retain that comic book feel.

Coloring the Collar Bone
Having finished with the face for now, we’re going to move on to the neck and collar bone, using the same techniques to blend out some of the shadows and create an awesome 3D feel.
We’re not going to get too detailed at this stage – it’s more about defining where the areas are before we go back in later and add more definition.
You’ll notice how Sycra actually paints over some of the line art in this area – that’s because he wants to define this area using color rather than lines.
Keep using your Eyedropper Tool when learning how to paint fantasy art to select the right hues for the area you’re working on and then just blend this into the lighter areas of skin tone.
Adding Color Value to Alice’s Clothing
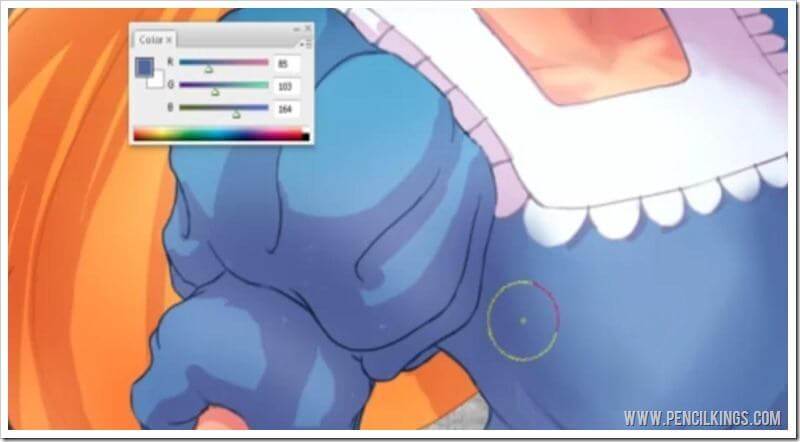
Once you’ve finished working on the neck and collar bone areas, you’re ready to start adding some more subtle areas of color to Alice’s clothing.
Take a large brush and use bold, sweeping strokes, thinking all the time about where the light source is coming from and how this will affect your painting.
Remember to sample your colors from the blended areas – this will ensure you get nice, subtle color gradients which look realistic.
Because your opacity is down low, you don’t need to worry too much about making a mistake with the color – you can simply go over it again with the right one.
An experienced artist such as Sycra will normally work with his opacity set higher and use the flow and pen pressure to get results. However, because most of you will just be starting out, it’s probably safer to take advantage of the opacity option and keep this nice and low until you gain more confidence.
Remember to keep comparing your before and after layers to see how your work is progressing. Turning the black and white Color Value Layer on and off will allow you to see how your painting now has clearly defined forms which jump out of the painting at you!
After you’ve blended some areas of the clothing, move on to Alice’s arm and use the same techniques to create subtle shades in this area too.

Defining the Details

Now that the large areas are done, it’s time to zoom in and define some of the details in your painting more clearly.
Starting with the eyes, you’re going to be adding more precise areas of blending to help Alice’s features really stand out.
Here’s where the Navigator Window is your friend – you can use this handy feature to give you an overall view of your painting at all times and see how the changes you’re making affect the painting as a whole.
Experiment with how the Navigator Window works – it should be in the top right-hand corner of your screen.
Notice how it puts a marquee around the area you’re working on and how you can zoom in and out from here to find your way around your painting.

Duplicating Your Window
Another option is to create a new window of your work when learning how to paint fantasy art. To do this, go to Window > Arrange > New Window for Proportions.
This will then create a duplicate window of your work which you can then zoom in and out from without affecting the view in your original window.
Any changes you make on your original document will also be visible here, so this is another handy method of seeing how the changes you make to a detailed area such as the eye will look in the whole painting.

It’s all About the Eyes
When working on the eyes, the first thing you need to do is remove some of the harshness in this area.
Notice how the eyes are quite a stark white color? You can easily get rid of this by picking up some of the skin tone and, with your brush set at low opacity, just painting right over this area.
Moving on to the eyelashes, you need to get rid of the 100 per cent black and soften this flat color by using a dark shade with more color value. Simply pick up the color of Alice’s eyelashes, and then blend out this area using a fairly small brush.
Next, you can add some subtlety to Alice’s iris by taking some of the blue color and blending it in at the top.
The eye on the right-hand side would mainly be in shadow, so go over this area with a darker color to represent this.
Blending Colors in the Iris
Once you’ve done this, pick up some of the lighter blue in Alice’s iris and use this to blend into the darker color – notice how the eyes now appear really 3D?
For even lighter areas in the iris, you can even select some of the off-white used in the eyeball – if you look in your RGB slider, you’ll see that although this tone apears to be very light, it’s still far away from being 100 per cent white.

For the lower eyelids, take some of the darker color and blend, and then pick up some of the shaded skin tone color to go over it – this will now create realistic-looking bottom eyelids and eyelashes.
In the next lesson, you’ll be working on the eyes some more and making the other features in Alice’s face stand out.
Now you’ve learned so much about blending and how to paint fantasy art, you’ll be able to use these same techniques in any other paintings you work on!
Have fun, experiment and don’t forget to let us know how you’re getting on by leaving a comment below. See you next time!
Return to the Stylized Painting Lessons Page