How to Draw Different Nose Shapes: The Basics
Want to learn how to draw different nose shapes?
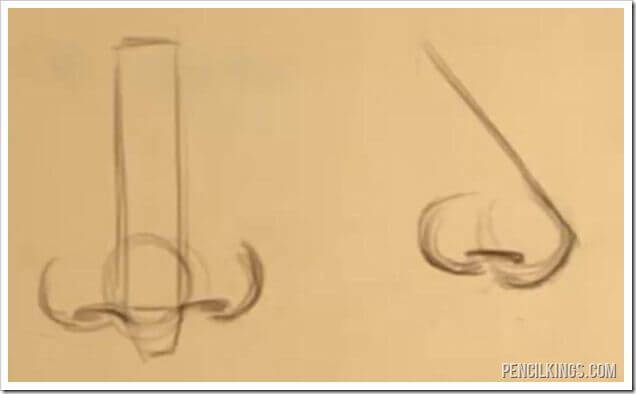
To begin drawing noses in different styles, here’s a look at the basic nose you learned how to draw in the previous lesson.
Remember, the nose is made up of these four basic parts:
- The Bridge
- The Septum
- The Ball
- The Nostrils
Now that you have a basic understanding of how a nose is drawn, you can manipulate these four basic building blocks to learn how to draw different nose shapes!
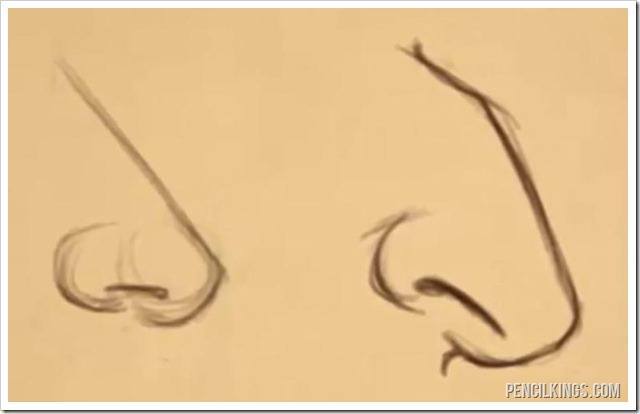
Drawing Noses Example #1
To create this first unique nose, instead of having a smooth bridge, you’re going to push it out to form a distinct bump on the upper part of the bridge. The next modification you are going to make is to first place the nostril wing higher up which will force the actual nostril hole to angle downward.
The final result is a nose that is a lot more angular than the generic nose to the left. While you are playing with drawing these nose variations remember the fundamentals and how the different parts relate to each other like how the nostril hole flows into the ball of the nose.
Keeping the basics in mind at all times is the real trick to learning how to draw different nose shapes of all varieties!
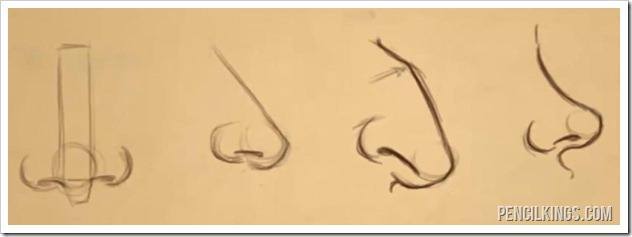
Side View Nose Drawing Variations
This image shows the comparison between the generic nose on the left to the new noses you have drawn in this lesson.
To get the look of the nose on the far right, instead of having a bridge that travels along a straight line, this bridge is angled inward. Another modification that was made here was to angle the nostril upward instead of downward like the first nose drawing variation.
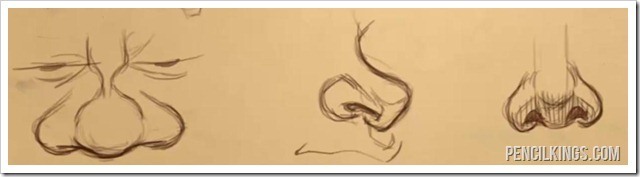
Additional Nose Drawings
In these drawings from the front view you’re first going to start with an hourglass shape for the bridge of the nose in the first example. Then you’re going to push the nostrils outward.
While you are drawing these, remember to let certain parts of the nose overlap to give the effect of depth. In the first example you can see how the ball of the nose is overlapping the nostrils.
In the middle example Sycra shows in the video how you can quickly establish the rhythm of the nose to place the bridge, ball and nostril so that they all flow naturally together.
In the final example on how to draw different nose shapes, you will be drawing an upturned nose. You can achieve this by placing the ball of the nose higher and then adding some shading into the lower part of the nose.
In the next lesson on drawing noses, you will learn about basic nose proportions and how to place the nose on the face. This will teach you exactly how tall to make the nose in both the front and side views.
Return to the How to Draw a Nose Lessons Page