[one_third]
[/one_third][two_thirds_last]
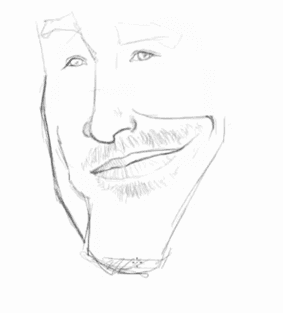
Caricature Drawing Tutorial: Defining the Outer Edge of the Face
For the next part of our caricature drawing tutorial, we’ll start off by drawing the lines to establish the outer edge of the face.
Look closely at the reference to get a sense of what wrinkles you want to add into your drawing. Remember that this drawing is a work in progress so any line work can always be painted over later.[/two_thirds_last][one_half]
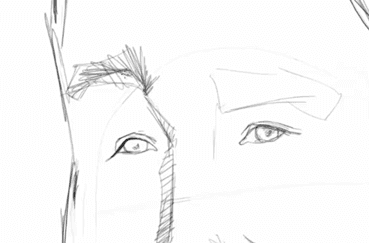
Sketch Shading
As Giovani begins to shade in this drawing note how quickly he is able to shade and how his lines are all flowing along the same direction. In this example here you can see two different types of shading: One on the side of the nose, and another on the eyebrow.
The eyebrow shading is a little different, because instead of all the lines following one direction, they turn to follow the direction of the eyebrow.
[/one_half][one_half_last]
[/one_half_last][one_half]
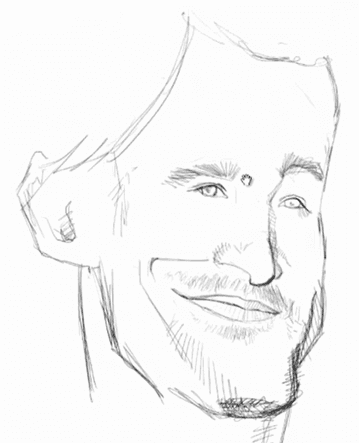
The Face So Far
Here’s a look at how the drawing is going so far in our caricature drawing tutorial. Here are the key things to note:
- While the silhouette of the chin is rounded, the shading on the bottom helps define the chin as being more square and masculine.
- The ear has been added, and exaggerated, but it’s not a key feature of the caricature because there’s nothing too special about Hugh Jackman’s ears.
- We’ve started to add some stubble to the drawing, but we’re going to need to add a lot more in order to hit the signature look of Mr. Jackman.
- You’ll also notice that this image is flipped compared to the previous images. It’s always a good idea when working digitally to flip your work and see if there’s anything that needs to be fixed.
[/one_half][one_half_last]
[/one_half_last]We hope you’ve enjoyed this caricature drawing tutorial and that you’re now ready to start drawing perfect faces.
See you in the next tutorial!