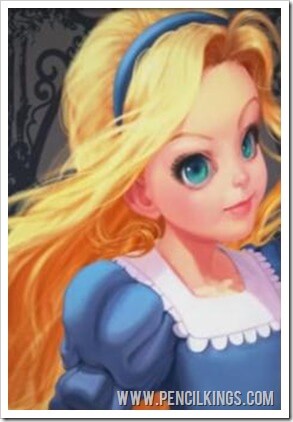
Here’s a preview of how our finished painting will look:
How to use Reference Pictures in Your Painting
Ready to learn how to draw Alice in Wonderland Anime style?
Now you’ve decided upon your composition and framed your thumbnail, we’re ready to get to work on creating a rough sketch of Alice.
But, before you do that, you’re going to need some reference pictures to work from. Because you’re working from imagination, you’ll need these to help fill in the gaps in your knowledge.
For example, we know Alice is a seven-and-a-half year old girl, but what should her skin tone look like? She’s wearing a dress, but how do the folds of the fabric look?
This is where reference photos come in really handy – giving you a clear idea of how things should look so you can then incorporate these into your finished painting.
Filling in the gaps in Your Knowledge
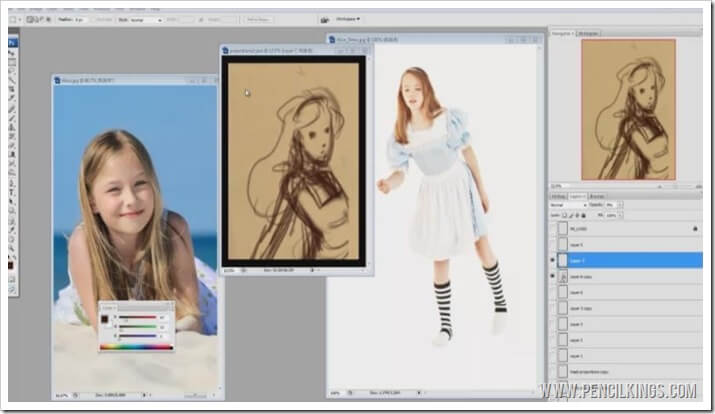
You’ll notice Sycra has chosen a couple of images as reference pictures to work from.
When learning how to draw Alice in Wonderland Anime style, you can do the same. Either search online for ‘Alice in Wonderland’ or use some reference pictures of your own – perhaps you have a little sister or, if you’re a girl, some photos taken when you were younger?
Sycra’s chosen the larger picture on the left because this will help him when painting skin tones and hair, while the picture on the right has useful details such as Alice’s dress, which will be of real value when he begins sketching and painting.
Because you’re working on a stylized painting and not a photo-realistic one, you don’t need to copy the colors and shading exactly. You already have your pose and composition, so these reference pictures are there to help you out and make decisions about how your finished painting will look.
When working from memory, your idea of what things look like can sometimes differ to what they look like in reality. That’s where reference pictures can kick-start your memory and help you incorporate what you already know into an accurate representation of what you’re sketching or painting.
Choosing a Reference Picture to Work From
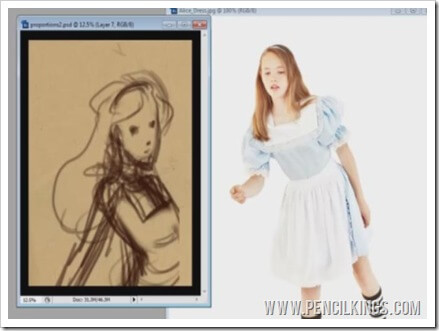
The picture on the right is ideal for your rough sketch, since it contains many elements – such as the folds in the dress – which you’ll need to start work on the rough drawing.
We can leave the larger picture on the left for now, but we’ll be coming back to this when we start painting skin tones and hair later in this course on how to draw Alice in Wonderland Anime style!
Flipping Your Image Horizontally
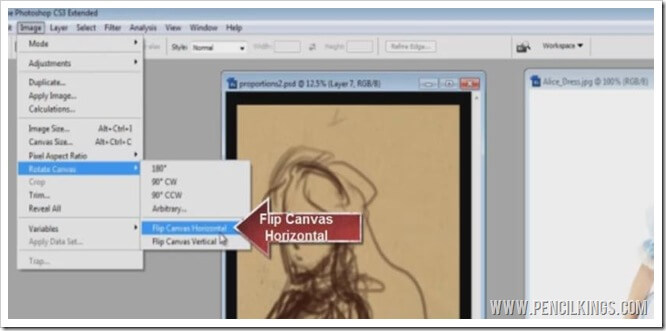
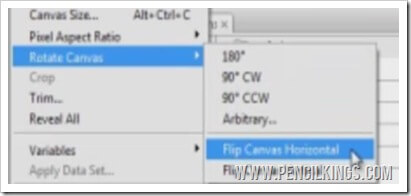
You may find that your reference picture is facing the opposite way to your thumbnail sketch. This isn’t a problem, since in Photoshop, all you have to do is go to Image > Rotate Canvas > Flip Canvas Horizontal.
There are many good reasons for doing this – when working on a sketch or painting, you can sometimes get too involved so you can’t see any mistakes.
Flipping your canvas will give you a fresh insight into any areas of your painting that aren’t working as well as they should be.
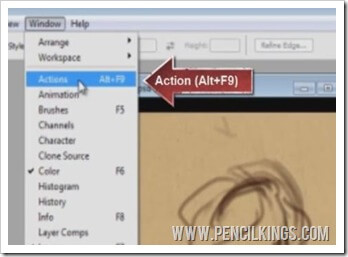
Time for Actions!
Flipping your canvas horizontally is a technique you’ll find yourself using time and time again.
And, as such, you may begin to find it a little frustrating having to continuously go to the Photoshop menu to do this.
Fear not! That’s where Photoshop Actions come in – a handy feature designed to make repetitive tasks a thing of the past!
Sycra has set up a Photoshop action so that he only has to press one key to flip his canvas horizontally.
To set up your own, go to Window > Actions (Alt + F9), then create a new action using the button near the trashcan on the Actions window.
It looks a little like the New Layer button.


Once you’ve clicked this button, you’ll see a new menu pop up asking you to name your action and define a key for it.
Sycra calls his action ‘Flip Canvas Horizontal’ and chooses F2 as the key to activate this action.
He then hits the ‘Record’ button, knowing that once he’s done this, Photoshop will record and save everything he does next.
Defining Your Action
Once you’re recording, you then need to carry out the task you want Photoshop to perform for you as an Action.
Go to Image > Rotate Canvas > Flip Canvas Horizontal.

Then, look across the bottom of your Actions window and you’ll see a series of buttons including the red circular button for ‘Record’.
Hit the ‘Stop’ button next to this and now, Photoshop will have recorded your Action, meaning you can now flip your canvas easily and quickly just by hitting F2. How cool is that?
How to Draw Alice in Wonderland Anime Style: Creating Structure
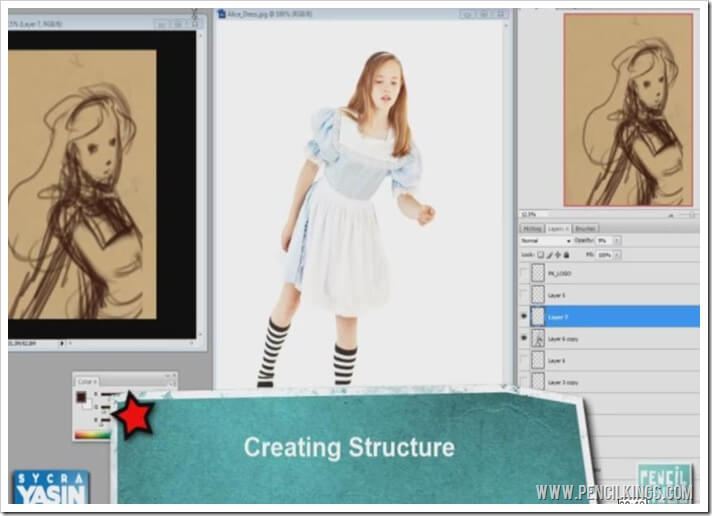
So, now you’ve got some handy Photoshop Actions recorded, you can move onto working out your sketch of Alice from the thumbnail using the reference pictures to guide you.
What separates the sketch from the thumbnail is that, in this lesson, you’ll be breaking the figure of Alice down into a series of geometric shapes and making sure all elements of your drawing – such as proportions and perspective – are correct.
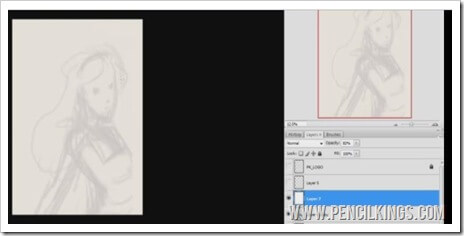
To begin, go back to your thumbnail, then create a new layer and fill this with white.
Then, reduce the opacity of this layer so you can see your thumbnail sketch beneath – Sycra goes for around 82 per cent opacity.
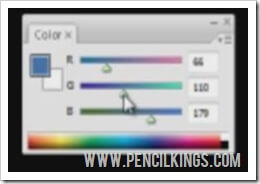
Next, create another new layer above that, and then select a color to draw with.
Sycra chooses a blue, but you can choose any color you like – just make sure it’s one you can clearly see above your thumbnail sketch.
Having selected your color, you can now move on to the first stage of creating your Alice portrait by sketching in the form of her body.
Getting Sketchy
We’re now ready to start sketching in the figure of Alice in preparation for your fully-rendered digital painting.
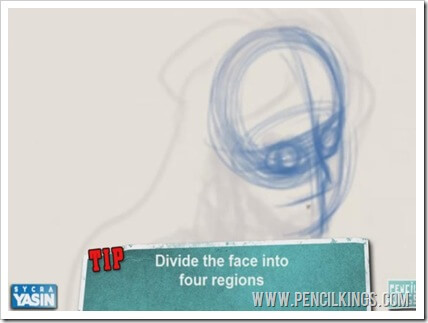
First of all, sketch in the basic head shape, remembering to divide the face up into four regions to show you where all the features should go.
If you need to, refer to Sycra’s video series on drawing face proportions to help you do this – there’s a section dedicated to every feature and it might be a good idea to refresh your memory for this lesson.
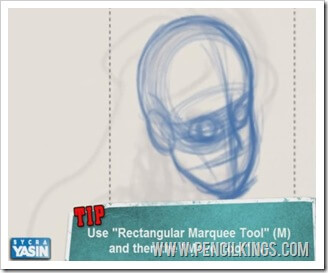
Once you’ve sketched in the head, you might decide you want to move this slightly so it sits more in line with your thumbnail sketch.
An easy way of doing this is to select the Rectangular Marquee tool (M) from the Photoshop toolbar.
Then, just grab your drawing and move it slightly using the Move Tool (hit the ‘V’ key to activate) until you’re happy with its position.
Drawing the Neck
Once you’ve moved the head to where you want it, you can start sketching in Alice’s neck. This begins just behind the ear and curves down to the shoulder. There’s a muscle which runs from the ear to the collarbone or clavicle, so sketch this in too.
Notice how Sycra has drawn the neck as a kind of cylinder shape? We’re going to stick with using these 3D shapes all the way through our lesson, because this is the best way of representing them in our drawing and finished painting.
In the next lesson on how to draw Alice in Wonderland Anime style, you’ll learn how to apply these techniques to drawing the body as we prepare to start work on our fully-rendered digital painting of Alice!
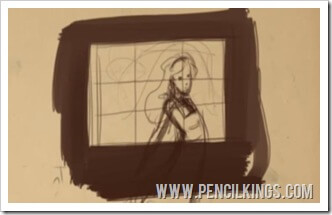
Blacking out Your Frame
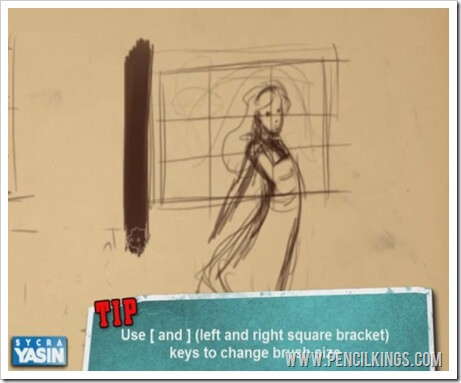
Once you’ve found several compositions you like, it’s then a good idea to create a new layer, change your brush size and black out the frame around your picture – this will help you see it more clearly so you can make that all-important final decision on your composition.
For added speed, use the left and right square bracket keys ([ and ]) on your keyboard to change the brush size easily, and then black out the shape of the frame so it stands out.
With these three different compositions side by side, you can decide more easily upon which one you like best.
You make like some elements of one composition, but decide that perhaps another one works best for what you’re trying to achieve in your painting.
Although Sycra likes the example shown here, he eventually decides upon a composition that zooms in more on the figure of Alice.
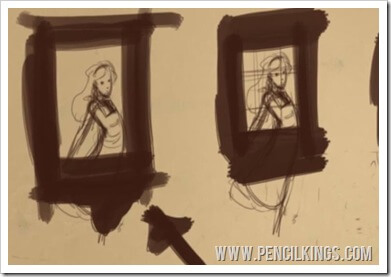
The middle composition is looking pretty good, but Sycra eventually chooses the example shown here because it combines the best elements of the other two.
The middle one looked a little cramped and the example on the right had a little bit too much space.
Now you’ve decided upon the perfect composition, you can move on to the exciting first stages of creating your finished painting!
Be the Cream of the Crop
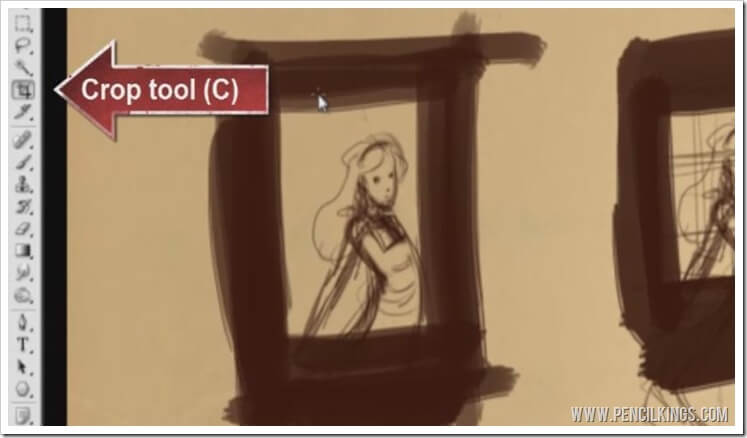
Once you’ve chosen the composition, it’s a good idea to then crop your image using Photoshop’s Crop tool – you can select this from your toolbar as in the example above.
However, because we’ve just quickly blocked in the frame, our image is going to look slightly different when we crop it precisely. We’re now working with perfectly straight lines rather than ones that have been roughly added.
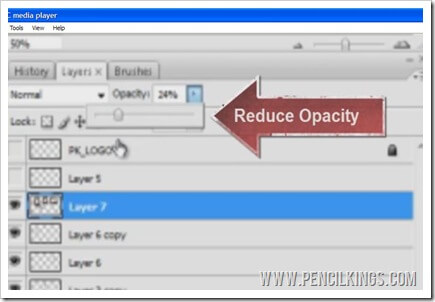
Reduce the Opacity of the Frame
Don’t sweat it if you don’t get it right first time – the beauty of working digitally is that you can have as many attempts as you like. Once you’re satisfied with the result, be the cream of the crop and hit that key!
The way to get round the problem of straight lines versus sketchy ones is to reduce the opacity of the layer which has your frames on – this will give you a clearer idea of where you should crop your image.
Experiment with the Crop tool until you’re totally happy with the composition.
You can even rotate the frame slightly to give you a better finished image.
Supersize Me – Resizing Your Cropped Image
Once you’ve cropped your image, you’ll notice that it’s now very small – to turn this into a finished painting, we’re going to have to go supersize!
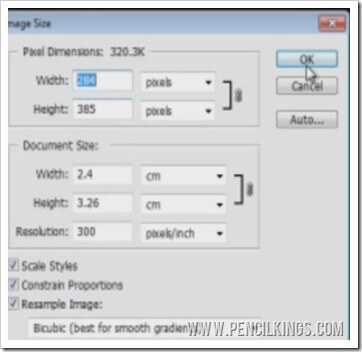
Go to Image > Image Size and let’s take a look. The width of Sycra’s Alice sketch is only 284 pixels – not nearly large enough for what we need.
However, because we’ve been working small, our drawing has got lots of life to it – something that’s quite tricky to achieve when you’re working big.
If you were working traditionally, you’d have to photocopy your sketch and then blow it up to work from.
Thankfully, Photoshop has a much easier way of doing this – go to Image > Image Size once more and blow up your image to 1000 per cent – supersize!
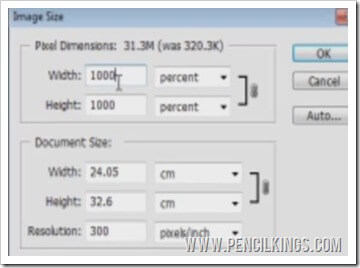
So now, you have an image that’s been cropped to your requirements at a size you can easily work from.
This is the thumbnail image – in the next lesson on how to draw Alice in Wonderland Anime style, we’re going to be working this up into a rough sketch before moving on to start work on the line art!
Return to the Comic Penciling Lessons Page