
Here’s a look at the final painting in our series on how to paint fabric in Photoshop
Ready to learn how to paint fabric in Photoshop?
You’ve now started applying blends to Alice’s clothing, so in this lesson, we’re just going to carry on adding those subtle shades and build things up so you end up with realistic-looking fabric.
This is quite a long process, so you’ll notice that Sycra has some of this video in time lapse to speed things up for you, the viewer.
Take your time when applying blends – it’s all about subtle variations of color which, when built up layer upon layer, create an awesome 3D effect that people will really notice!
Blending the Folds of the Fabric
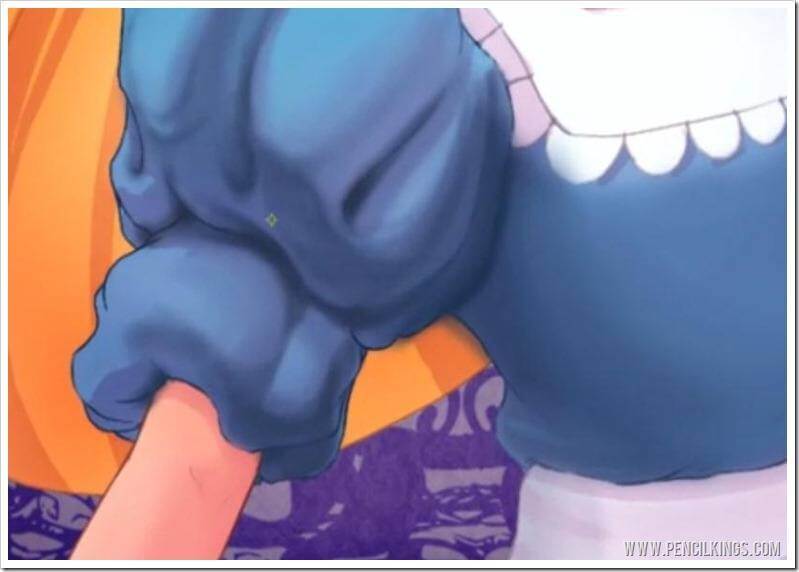
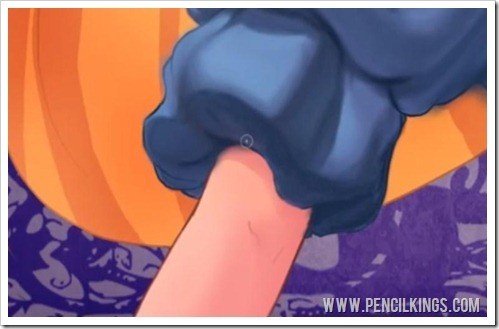
Continue adding broad areas of tone to your painting, taking note of where the shadows and highlights will fall. Use your reference photos to help you out if you’re unsure as to how the clothing should look.
Remember that the areas furthest from the light will be darker, such as Alice’s shoulder on the right-hand side of the painting and parts of her hairband.
When learning how to paint fabric in Photoshop, keep working on the forms to get them looking as 3D as possible and keep zooming in and out of your painting to get a better idea of how everything is looking.

Adding Shadows to Alice’s Apron
When working on the shadows for Alice’s white apron, pick up a much darker color and make some broad brush strokes to blend the lines in.
As with the rest of the clothing, try and think about the form of the fabric and how its folds will catch the light or remain in shadow.
At the top of her shoulders, Alice’s hair is blocking the light, so this part of her apron would be in shadow.
Remember to pick up some of the skin tone when adding this shaded area to represent how the color is being reflected.
You don’t need to be too precise at this stage, because you’ll be going back in and cleaning all these areas up in a moment.
Cleaning up the Clothing
To speed things up, the next section of this video is in time lapse.
Here, you’ll see how Sycra just keeps going over and over the various sections of the clothing, refining his blends and smoothing everything out.
It takes a while to do this, but the end result is well worth the wait!
Once you’ve got some broad areas of color down, you can then go back in with a finer brush and start adding some detail.

When blocking in areas of cast shadow, remember that these tend to be more saturated colors.
A good example of this is the cast shadow on Alice’s neck, where Sycra uses a more saturated yellowish tint to create an awesome effect.
At all times, try and think about where the light source is coming from and use this to help you make decisions about where the shadows should fall.
When adding shadows to the folds of the fabric, remember that these will be cast shadows too, so feel free to make these areas more saturated in color.
Losing the Line Art

Once you’re done applying blends to the clothing, take a finer brush and blend in any areas of the line art that still remain.
Take a good look around your painting and work on any areas that still need attention. Notice how Sycra blends some more colors into Alice’s apron and adds a cast shadow on her arm where the sleeve of her dress ends.
If you need to, re-work any areas of strong shadow that need a little more contrast.

Flip Your Canvas to get a Different View
As a final step, flip your image and look for any areas that need improvement.
Sometimes, it’s easy to get lost in your painting and it’s only when you look at it from a different angle that you can see areas that still need a little work.
Feel free to keep making changes as you go along. Here, you can see how Sycra keeps reworking areas until he’s 100 percent happy.
Remember to turn your layers on and off so you can see how these changes look and check the black and white color value layer to see how these are now looking.
Now that most of the painting is finished, it’s time to return to the hair. In the next lesson, you’ll be picking up some amazing industry insights into how to achieve realistic flowing locks in your painting.
We hope this lesson has taught you a lot about how to paint fabric in Photoshop. You’ll now be able to take your new skills and apply them to everything else you want to paint!
Return to the Stylized Painting Lessons Page