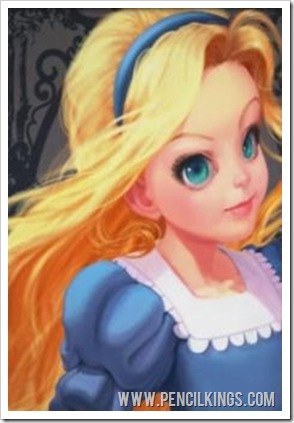
Take a look at the finished painting in this series:
Learn to Draw Faces: Facing the Facts
Want to learn to draw faces?
Now that you’ve added hair and clothing to your drawing of Alice in Wonderland, it’s time to add those all-important facial features to really give some personality to our painting.
Drawing the face is probably the hardest part of this series, but getting it right is crucial to creating a fantastic finished painting. In this lesson, you’ll learn how to add facial features in preparation for working on a fully-rendered digital painting of our character.
Keeping the Face full and Childlike
At the end of the last lesson, we touched on drawing the face and how you need to make sure the features look childlike.
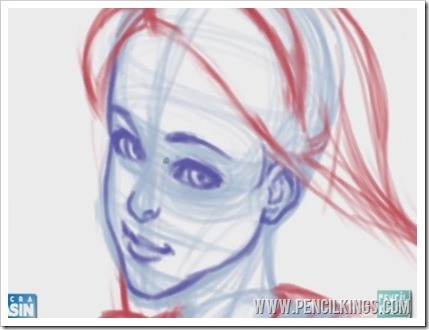
A good example of this is the cheekbone – making this too angular would make Alice look a lot older than her seven-and-a-half years.
Now, you’ll learn to draw faces by adding in other features such as the ears in preparation for your finished painting.
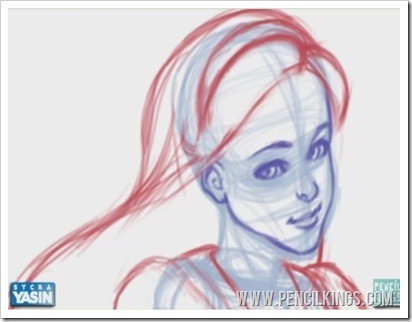
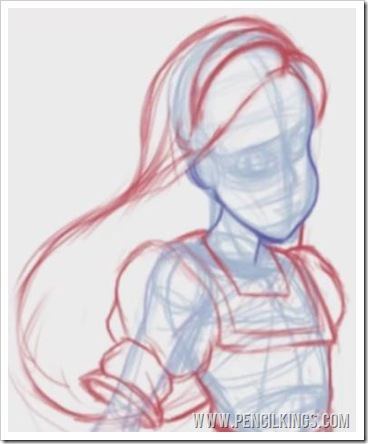
First of all, draw Alice’s jaw line, remembering to also keep this quite rounded. Next, add some pupils to give you an idea of which way the eyes are looking.
After this, sketch in the ear – refer again to Sycra’s series on facial features if you’re unsure how to draw this.
Flip the Face to Catch Mistakes
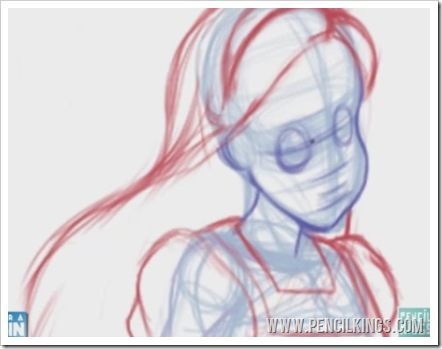
Remember to keep flipping your image horizontally to catch any mistakes.
Here, you can see how Sycra’s noticed the eyes are not quite lined up correctly – something he may not have noticed if he hadn’t flipped his canvas.
Thankfully, this is a really minor issue that can be corrected easily and quickly.
And, getting it right now will save you a lot of extra effort when you learn to draw faces. It means there will be less work to do when you come to work on your finished line art and digital painting!
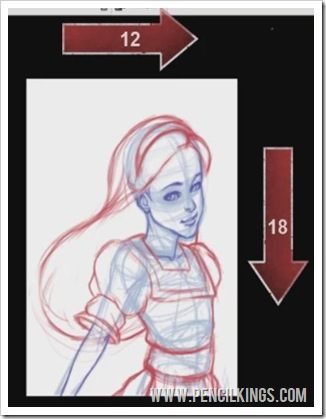
Once you’ve flipped your image and made any adjustments you think necessary, start adding some other details such as the neck, collar bone and the arm. Eventually, you’ll be left with a finished sketch that is clearly visible to others.

To make the finished drawing stand out even more, make the layer featuring the framework invisible by simply clicking the eye symbol in Photoshop’s Layers Palette. You’ll then have a finished drawing sitting on a clean, white background.
Once you’ve done this, go back to your drawing layers and erase any lines you don’t need. Now your drawing is ready for review!
If you’re producing work for someone else (usually known as an editor), now is a good time to send this version to them for feedback.
Sycra produced this Alice painting for Pencil Kings and, when one of the website’s founders received it, they came back with a few suggestions as to how they wanted the picture to look.
This is known as revision – it’s a part of the creative process you’ll become increasingly familiar with as your artistic career develops.
Revision and Re-working
After looking at Sycra’s sketch, the founders of Pencil Kings wanted Alice to look younger, possibly in Anime style and to be looking forward. They also wanted to be able to use the painting on a 12 x 18 inch poster.
Many of you will already be familiar with the Japanese style of cartoon drawing known as Anime. Characters drawn this way tend to have very cute features including large eyes.
So, having taken these suggestions on board, Sycra made some changes to his drawing, still using the original framework layer as his basis.
This is something you might also want to consider when you learn to draw faces.
Revision is an integral part of any creative process – even if you’re not producing work for a client. For example, you might finish a drawing then come back to it at a later stage and decide to make some changes.
Sometimes, it’s a good idea to take a few steps back from your work and assess how you could maybe improve upon some areas.
Don’t look upon people suggesting changes as a negative criticism of your work – it’s simply because they’re looking at it in a different way and may be able to spot things you’ve missed.
Why Working in Layers is so Important
Throughout this series on learn to draw faces, you’ll have noticed that Sycra always suggests you work in layers rather than doing everything on the same one.
Here’s a classic example of why this is so important – because we drew the face on a separate layer to the body and hair, we can easily make any adjustments without touching our other work. Imagine if you’d done everything on the same layer – re-drawing the face would mean you also had to adjust everything else!
Taking Years off Alice
The editor suggested making Alice’s face look younger, so we need to think about how to do this.
The first step is to alter the shape of her face to make the cheek much rounder and then make her neck a little thinner.
We’re also going to make her eyes a lot larger, as in Anime cartoons.
Doing this will change the proportions of her face slightly, but we still want to keep the original placement of the eyebrows halfway down her head.
Because the framework of our drawing is still visible underneath, we can easily make these alterations without losing sight of where each feature should fall on the face.
Sycra decides to lower the bottom line of the eye before redrawing the sections for where the other features should be.
Notice how he draws two large circles for the eyes but still keeps them an eye’s width apart.
Once you’ve got the alignment right, you can erase the guides and carry on.
Sticking with the style of Anime, Sycra draws the irises of the eyes very large and simply draws a line for the nose before starting work on Alice’s new mouth.
He also raises the eyebrows slightly to give his drawing that Anime feel.
Because he wants to capture the peaceful feel of his earlier drawing, Sycra has several attempts at drawing the new mouth, sketching in fresh guidelines to help him determine where its center should be.
Eventually, he decides upon a much smaller mouth with a fairly nondescript expression – the focus here is clearly on the eyes.

Notice how he also re-draws the ears, because the eyes are now much larger. Although this is now a much more stylized drawing, the proportions and features still follow the same rules as before.
Once you’re done, you should end up with a drawing that captures Alice in an Anime style with her eyes facing forwards.
In the next lesson, you’ll learn how to make some further revisions and use this drawing to create the line art for what will eventually become a fully-rendered digital painting!
Did this lesson help you learn to draw faces? Let us know in the comments section below.
Return to the Comic Penciling Lessons Page