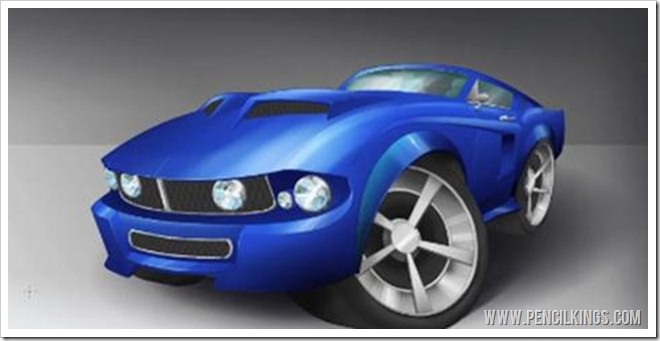
Let’s take one last look at the finished painting in this series
Congratulations – you’re nearly at the finish line of your series on how to draw a car in Photoshop!
In this final lesson, you’ll be adding those all-important finishing touches to your 1967 Mustang and picking up a whole load of awesome professional tips from April along the way.
So, if you’re ready to go the final mile, hop into the driver’s seat and let’s step on the gas!
Here are the Main Points to Take Away:
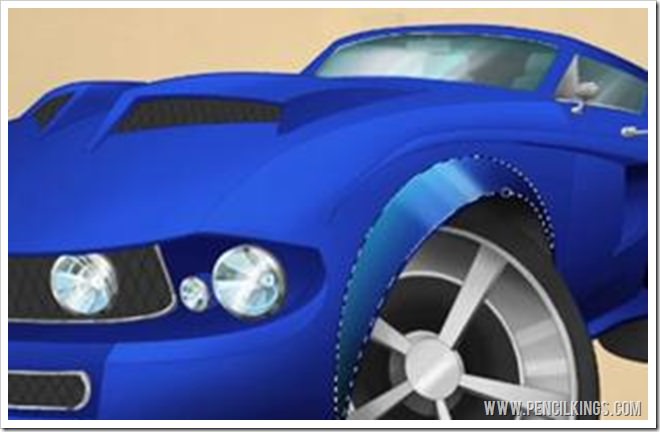
How to Draw a car in Photoshop: Make the Front end pop!
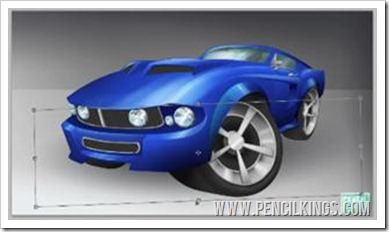
At this stage in your painting, it’s worth taking a good look around to see if there are any areas which can be improved upon.
Here, you can see how April decides to re-work the front end of her 1967 Mustang and make the wheel arch shine.
Because this is one of the most prominent features of the car, you can really go to town with some sharp, crisp highlights by using a hard brush and a really light blue color.
Also, when learning how to draw a car in Photoshop, it’s a good idea to consider the edges of the more prominent features when adding highlights and notice how they catch the light.
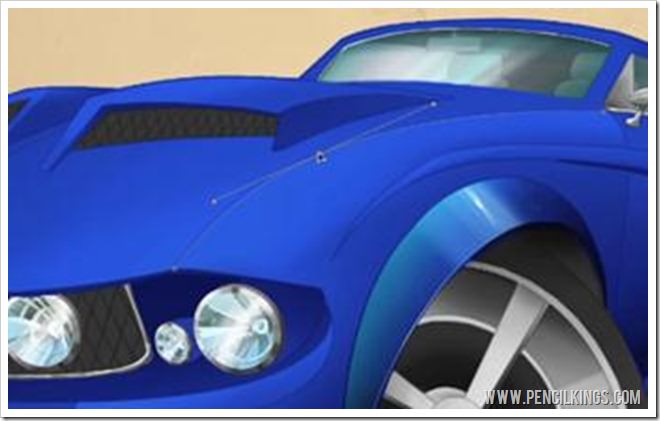
Using Your Pen Tool for Clean Highlighted Edges
When learning how to draw a car in Photoshop, using the Pen Tool is a great way to achieve a really clean edge for your highlights. After creating a new layer for these, simply use the same process as before in this series to draw a precise shape which can then be filled with a light blue color.
Use Linear Dodge Mode to buff up the Bumper
Another awesome technique for applying highlights is to set your brush to Linear Dodge mode. This will allow you to paint using a highly saturated color such as the light blue we’re using here and bring it to white without losing any of its vibrancy.
You can also use this technique to add highlights to other parts of your 1967 Mustang, such as the hood and the area just beneath the grill.
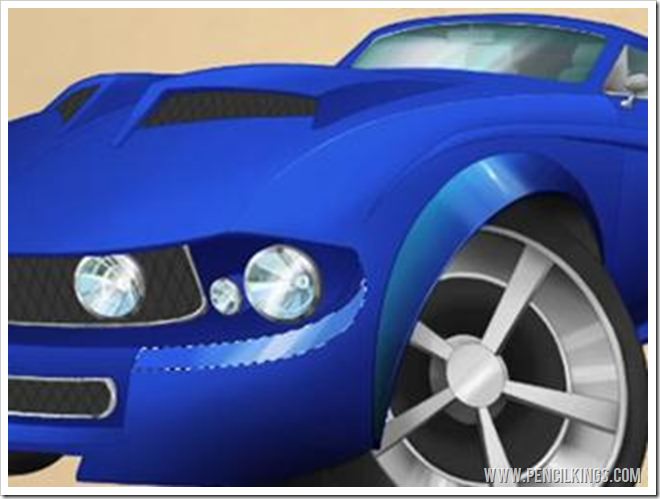
Using a combination of soft highlight gradients and sharper highlights drawn using the Pen Tool will help you achieve a super-realistic effect.
Keep zooming in and out of your painting and tweaking areas until you’re happy. Take as long as you like.
Now, the only thing left to do in this lesson on how to draw a car in Photoshop is to add a background!

Go the Extra Mile by Adding a Background
Adding a background will really make your 1967 Mustang stand out. You can add one easily by first grouping all the various layers of your painting into one folder and creating a new layer for the background.
Then, fill your background layer with a neutral gray color.
After this, choose a darker color by clicking on what will now be the foreground color in your Toolbar and using your Eyedropper Tool to select a deeper shade.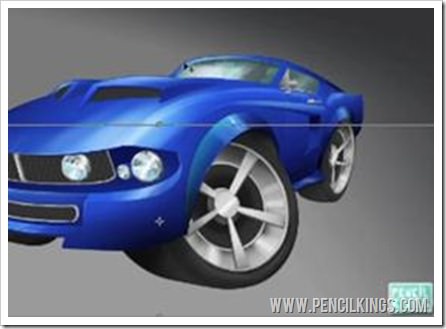
Next, go to your Gradient Tool and make sure it’s set at Foreground to Transparent in your top Menu Bar.
Using this, apply a gradient to each corner of your painting.
Once you’ve done this, make a duplicate layer of your background and hit Ctrl + T to create the bottom part of the background.
You can then apply a lighter color gradient to this layer to create the ground.
If you wish, you can also create another new layer to apply darker gradient shades to each corner of your background.
Finally, create a shadow beneath your 1967 Mustang by using the Gradient Tool again, but this time selecting Radial Gradient from your Menu Bar.
Once you’ve done this, you can hit Ctrl + T and adjust the shadow to suit.
Notice how shadows fade out towards the edge?An easy way to create this effect is to duplicate your shadow layer, make this smaller, and then reduce the opacity of the larger shadow.
You’ll also notice that shadows have softer edges the further away they are from the object casting them.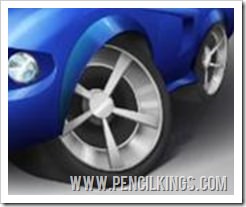
It’s easy to recreate this by simply applying some brush strokes to the areas nearest the wheels, for example.
Small details such as this can make all the difference to your painting!
And…you’re done! We hope this series on how to draw a car in Photoshop has taught you everything you ever needed to know about painting cars and inspired you to try out your new skills on lots of other subjects.
Remember, your feedback is like the sound of a well-tuned engine to our ears, so feel free to leave some comments in the box below!
Return to the Car Caricature Render Lessons Page