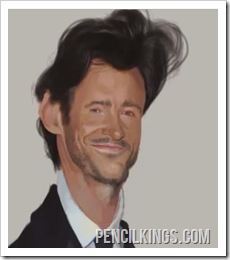
Here’s a look at the final painting in this lesson
How to Paint Hair: Learning how Colors Affect Each Other
In this final part of our series on caricature painting and how to paint hair, you’ll notice how the hair is finished off using a variety of brushes and colors which follow the natural flow of the hair and give added depth.
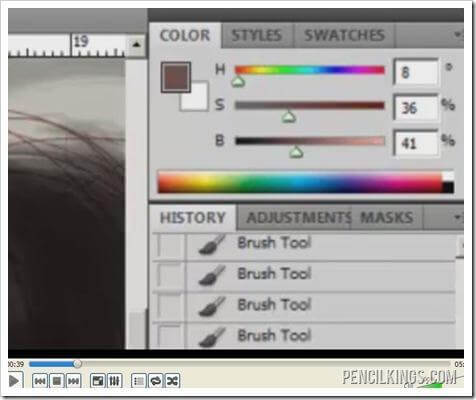
This is a good example of how different colors can affect each other when placed together – although the brown color selected for the individual strands of hair looks quite light when painted on top of darker colors, a quick look at the swatch tells you that this color actually isn’t as light as you might think.
This is called color theory and it’s something you’ll continue to learn about as you develop as an artist.
All colors influence each other and learning these techniques will help you create incredibly realistic effects in your work.
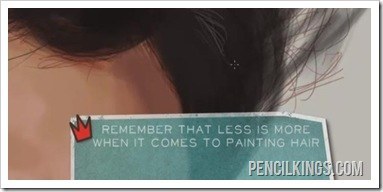
Less is More When Painting Hair
Many men worry about losing their hair, but when it comes to painting this feature, less is actually more! In other words, don’t concern yourself too much with painting every microscopic detail when learning how to paint hair- just use a variety of brush strokes and shades to get the right effect.
You might find it helpful to refer to the original photo when working out where to place the highlights. You can then use this as a basis for a more artistic approach – for example, you might decide to add a larger area of highlight than the one in the original image.
Again, this is something that you’ll soon master through working on a variety of different portraits.
Finishing off the Eyebrows
Once you’re happy with how the hair looks, you can apply a similar process to the eyebrows. You might find it useful to create a separate layer for these, as this will give you the ability to adjust the tint without affecting the rest of your painting.
Notice how some darker colors are now added to the skin tone beneath the eyebrows – this forms a nice basis for the brushwork above and helps the eyebrows really look as if they’re part of the face rather than simply being stuck on.
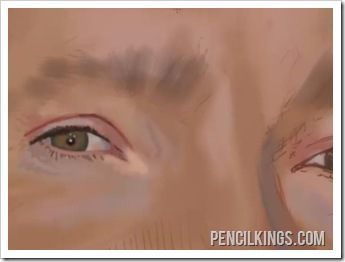
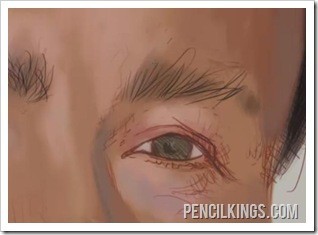
Use the same process of selecting a small brush and following the lines of the hairs to create a realistic effect.
The darker colors you used for the skin beneath the eyebrows will help fill in some of the blanks for the viewer; so again, you don’t need to go into the detail of every single strand of eyebrow hair.
In the next stage of learning how to paint hair, you’ll see how this same process can be used to create realistic-looking stubble.
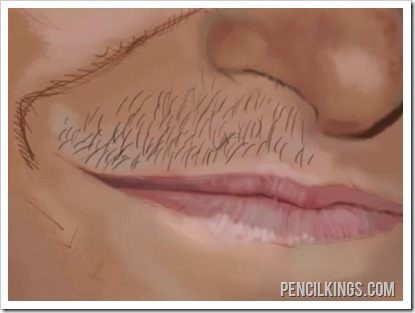
Getting Started on the Stubble
We’re now moving on to the final stage of the portrait, where you’ll learn how to take the same process used for the eyebrows to paint the stubble.
After under-painting the darker areas beneath, use the original photo as your reference when drawing in the stubble using a series of fine lines which follow the direction of hair growth.
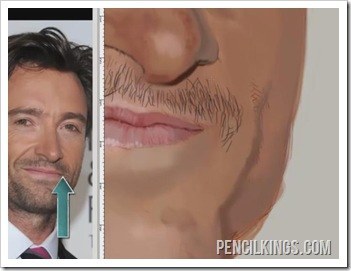
Adding Darker Areas to the Beard
Just like with the hair, there are darker and lighter shades of the beard, depending on where the light is coming from and how the hair growth differs across the face, such as where the highlighted area of Hugh Jackman’s moustache appears darker than the other side.
To represent this, use the original photo as a reference and paint in another layer of lines on top.
You’ll also notice how each of the hairs is a different length. There’s no need to try and paint every single hair, though – just use a variety of brush strokes going in various directions to create an authentic feel.
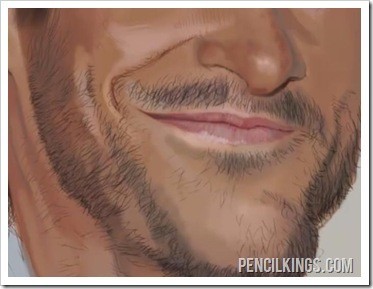
Finish With a Flourish of Facial Hair
You’ll notice how painting darker areas beneath the brushwork for the stubble really adds to the overall image and helps you achieve an effect that’s completely convincing.
Continue working in this fashion, adding darker areas here and there and using different lengths of brush strokes to create stubble that looks so real you could almost touch it.
We hope you’ve enjoyed our lessons on how to paint hair and learned a lot from the whole experience. Remember, the more paintings you create, the better an artist you’ll become!
Return to the How to Paint a Caricature Lessons Page