Do you suck at drawing hands and feet? Don’t worry! Learning how to draw hands and feet is one of the main areas artists get stuck on. Fingers, thumbs and toes can be a major headache for us all, so wouldn’t it be great if you could find a way of getting them right time after time? Read on, as we deal with those digits and lend a hand…
We’ve all been there. You’ve worked for what seems a lifetime on a painting only to discover your subject’s hands and feet look like a group of microwaved Corn Dogs or the subhuman claws of some monster from the deep. As any artist will tell you, people will always ignore the good parts of your painting and zone in on the mistakes, so hands that resemble processed meat products will always stick out like a sore thumb!
There’s no denying it – hands and feet are super difficult, but with practice and a few handy pro techniques, we’ll help you understand how these parts of the body are constructed and how to get them looking right. So, where do you start?
Learn How to Draw Hands – Grasping the Basics
What You’ll Need:
-
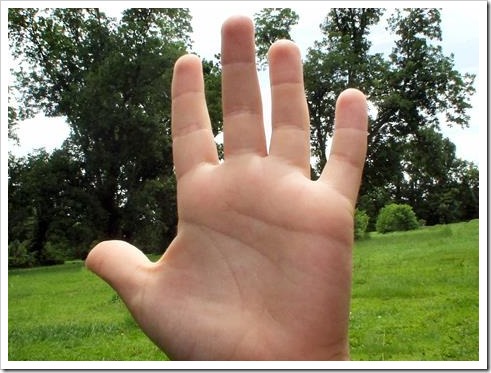
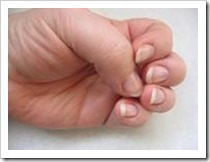
A decent image of a hand – why not download the one above?
-
Pencil and paper or a graphics tablet
-
A little patience!
As with other parts of the body, learning how to draw hands and feet begins with breaking everything down into simple shapes.
A good way to start is to draw the hand as if it was encased in a tight mitten with no fingers.
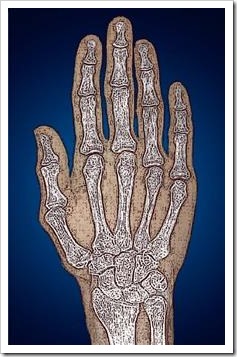
To help you understand how the hand is constructed, take a look at this anatomical graphic. Here, you can see how all the bones in the hand are connected and how they sit in relation to one another.
Always try and keep the underlying skeleton in mind when drawing any part of the human body – it will really help you achieve a realistic, anatomically correct result.
Don’t be afraid to sketch in some rough lines to indicate where the bones are if this helps – getting this right will make all the difference to your finished painting and help you avoid the ‘Corn Dog’ factor!
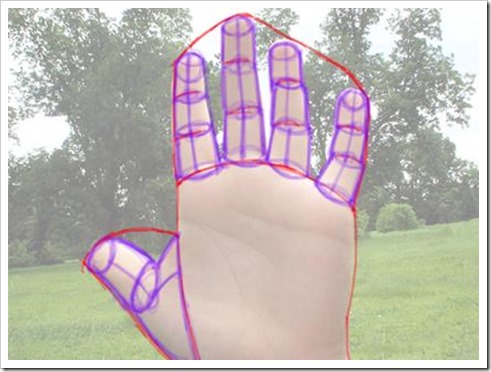
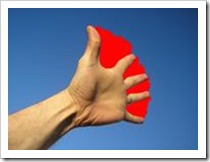
Next, draw some lines for the fingers to give you a good structure to work from. When drawing hands and feet, try and think about the direction of the lines and how they follow the form of the hand. Try and think of the fingers as cylindrical shapes –like a can of your favorite drink – and draw through the form to give you a 3D shape.
Take note of which fingers are longer than others – the middle finger is always the longest, while the first (index) and third fingers are usually about the same length. Eventually, your drawing should look a little like this – of course, you can use any colors you like!

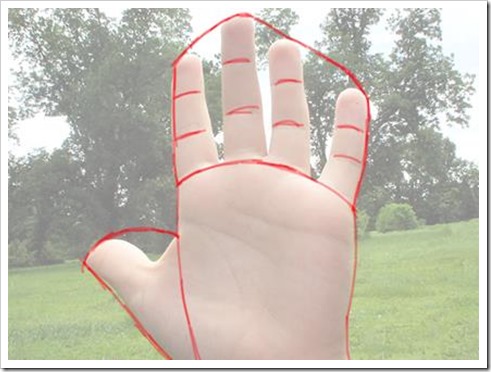
Think about how perspective comes into play and makes the cylindrical shapes of the fingers appear narrower as they move away from us. Placement of the wrist is also important – think of this as another cylinder attached to the hand. Pay close attention to the space and shapes between the fingers (often called ‘negative space’) as this will help you get everything correct –we’ve indicated this in the third picture on the right.
Try drawing hands as often as you can and take advantage of the great resources out there. Google ‘how to draw a hand’ and you’ll find an endless amount of hands drawn in every kind of pose to help you. Why not try tracing these initially as you find your way around the form of the hand and learn to understand it better?
While there is certainly a consistent formula for drawing hands and feet, you’ll notice how everyone’s hands differ quite a lot. Take good note of these individual quirks – they’ll help you achieve the realism you’re looking for.
How to Draw Anatomically Correct Hands
Take a look at Laurie B!’s series on how to draw hands and feet on Pencil Kings, where she takes you right from the early thumbnail stage through to a finished piece. Another great resource is Dynamic Figure Drawing by famous artist, Burne Hogarth, where the esteemed illustrator and fine artist breaks everything down into shapes and helps explain anatomy in incredible detail.
You should be able to find excerpts and images from this book online without trying too hard, so don’t worry if you can’t afford the whole book right now. Every great artist has practised drawing hands throughout their careers, so you’re definitely not alone in your search for perfection!

Learning How to Draw Feet – First Steps
In many ways, feet are even more difficult than hands to draw. Let’s face it – they look kind of strange with their squished toes, different shapes and other inconsistencies!
However, unless you’re planning to always draw people wearing shoes (a little tricky if you’re painting a beach scene), it’s important to understand how the foot is constructed.
Basically, the foot is a kind of steep wedge shape which rises sharply as it meets the ankle, with the toes spreading out from the widest end.
As with the hands, try and see this as a 3D object and draw through the form to give you a better idea of its construction. Take note of the arch between the heel and the toes on the inward-facing side.
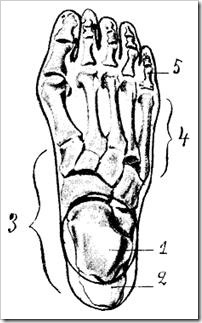
This anatomical drawing shows how the bones in the foot are constructed. As you can see, the foot is quite different to the hand, so understanding where all the bones sit in relation to one another will really help you to draw or paint this part of the body successfully.
The main points to note are the arch on the side of the foot and the way all the bones of the toes curve into each other. You’ll also notice how the big toe has a smooth upwards-facing curve, while the other toes face down at quite a sharp angle.
 Take a look at your own foot and see how it compares to these illustrations – no two pairs of feet are the same, yet they all follow the same underlying bone structure.
As with the hands, don’t be afraid to sketch in the bones underneath if this helps you.
How to Draw the Soles of the Feet
This illustration shows how the soles of the feet are formed. Notice how the vertical dotted line joins the heel and the big toe in each example? You might also find it helpful to draw some lines which follow the curves of the toes.
Learning how to draw feet will also help you draw people wearing shoes – even though the foot is hidden, its shape will still be visible in the curve and form of the shoes.
So, there you have it – the PencilKings guide to how to drawing hands and feet. Why not try drawing some of your own and uploading your work to our awesome new community site? Here, you’ll be able to swap tips, take part in drawing challenges and make new friends – see you there!