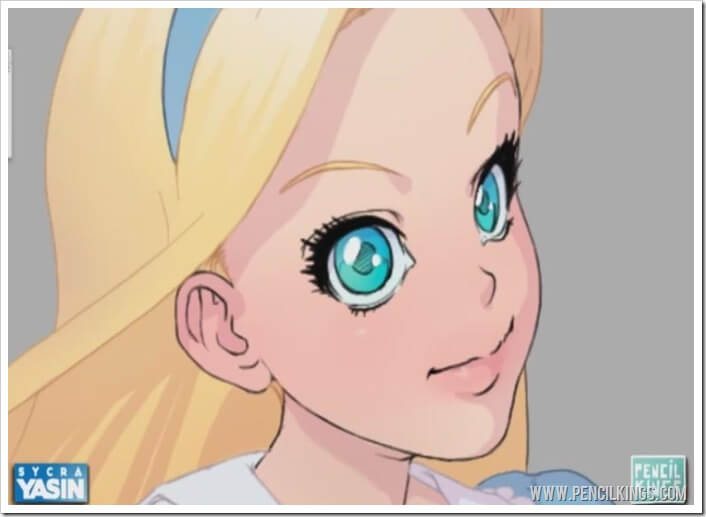

Take a look at the finished painting in this series on anime comic art
Having fun With Highlights
 Now that the shadows are all done, we can start adding highlights to our digital painting and really bring the character of Alice to life in our next lesson on anime comic art and painting.
 Before you get started on this, click on your ‘shadows’ layer and hit Ctrl and E to merge these layers down into one. Next, create a new layer above and hold down the Alt key to create another Clipping Layer for your highlights. Because we want our areas of highlights to look quite defined, we’re going to be using the Lasso Tool instead of a brush. You’ll find the Lasso Tool in your toolbar and once you’ve selected it, you can then draw shapes for where you want the highlights to appear.
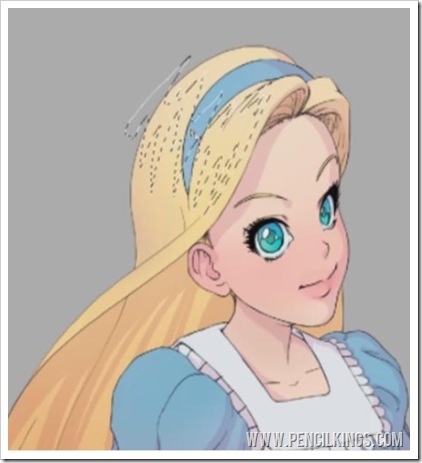 Here, we’re going to be adding highlights to the hair, so draw a random, jagged shape with the Lasso Tool that follows the shape of Alice’s hair. Once you’ve drawn your shape, you can then use the Gradient Tool to fill it with a light color. This is also found in your Toolbar and once you click on it, you’ll see this tool appear in the menu bar at the top. Here’s where you can then alter the gradient so it fills your shape with the foreground color blending into transparent – the second box along in your menu bar. Now it’s time to pick a color for your highlights – Sycra chooses a very light yellow that’s almost white.Draw a line running across the shape with your Gradient Tool and you’ll see that the shape is now filled with a blend of the foreground color going into transparent. Don’t worry about the shape appearing over Alice’s headband – in the next step, we’ll use the Eraser tool to rub out the areas where we don’t want the highlight to appear. After you’ve filled your highlighted shape, hit Ctrl and D to deselect it.
 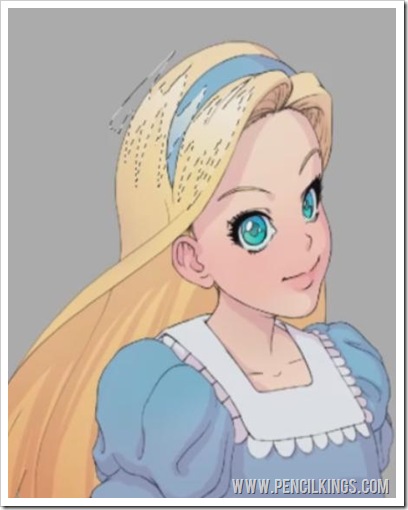 Once you’ve erased any parts of the highlight you don’t need, you can then add some other subtle areas of highlight to other parts of Alice’s face, such as on the nose, cheek and lower lip. Draw small circular shapes for these and don’t add too many highlights – we just want a nice, subtle effect that won’t detract too much from the rest of the painting. If you like, you can always blend these highlights in a little using the Eraser Tool.
Coloring the Line Art Layer
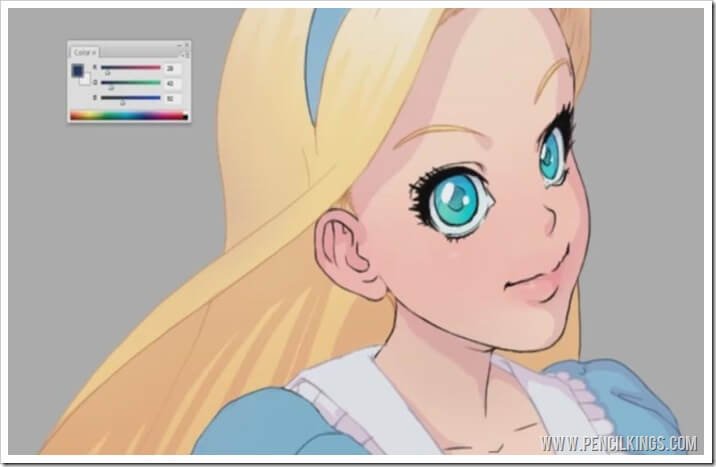
Once you’ve added all your highlights, you’re ready to start coloring the ‘line art’ layer. This will give your painting a much more subtle and realistic feel. To do this, go to your ‘line art’ layer and click the padlock symbol to unlock it so you can work on it. Next, click the button near to the padlock symbol that says ‘Lock transparent pixels’ – if you have an earlier version of Photoshop, this might be called ‘Preserve transparency.’ Then, grab your Pencil Tool, zoom in on your painting and start thinking about the various colors you want to use to color your line art. Basically, you want to be using shades that are slightly darker than the areas you’re working on. For example, the line art for the hair would look good if you used a slightly darker shade of yellow.
Painting Over Your Line Art
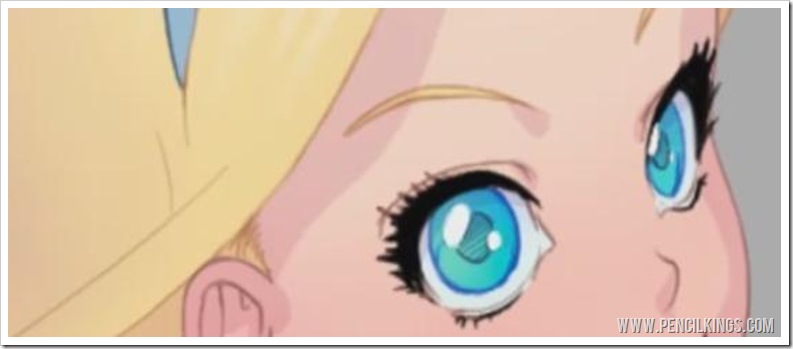
Once you’ve chosen a suitable color, go right ahead and paint over the line art with your Pencil Tool – try and think about which areas of your painting the line art belongs to. For example, the top line of the hair band would be a darker purple, while the bottom line would be dark yellow because it’s actually part of Alice’s hair. This is an optional stage – if you prefer your outlines black, feel free to leave them like that. However, coloring the line art can often result in a more subtle feel to your painting and it’s something Sycra and many other leading digital artists prefer to do. When coloring your line art, try and think about which areas of clothing might be overlapping the others. For example, the part of Alice’s dress just above the apron would look better colored in a dark blue because it’s part of the dress, not the apron. Keep zooming in and out of your painting to look for areas you might have missed. You can also use a larger brush for areas that aren’t quite so detailed. 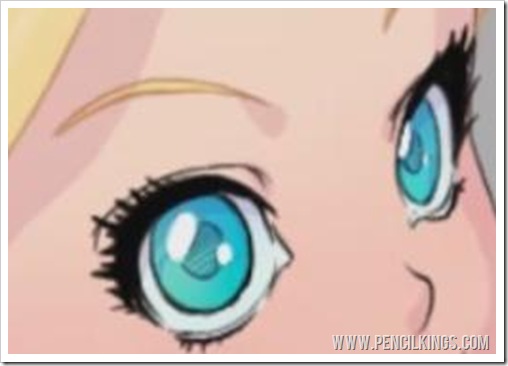 When coloring the line art for the eyes, be sure to get rid of any black from the highlights and select a dark color that’s not quite black for the pupils. We’re now going to finish off adding color to our line art layer, before moving on to make some final adjustments in preparation for the painting stage of our project.So, using your Pencil Tool, keep coloring in the various areas of your painting, selecting a variety of different colors for the facial features and skin. For example, you might choose a darker red for the lips and an even darker color for the edges of the mouth. For the middle of the lips, you might choose a lighter color.
Outlining the Iris
 For the outline of the iris, select a vivid, intense blue and color in the line art. This will have the effect of really bringing the eyes to life so they jump out of the painting at you.
Remember how we talked earlier in this series about using subtle shades with bolder colors to create epic effects? This is a good example of how a strong, intense color such as the blue can be used to contrast nicely with the more subtle pinks and purples of the skin color.
Once the eyes are done, you’re ready to move on to the next stage in this series on anime comic art – adding a background texture and making some final adjustments to the image before we start painting!Go to the Anime Comic Painting Video Course