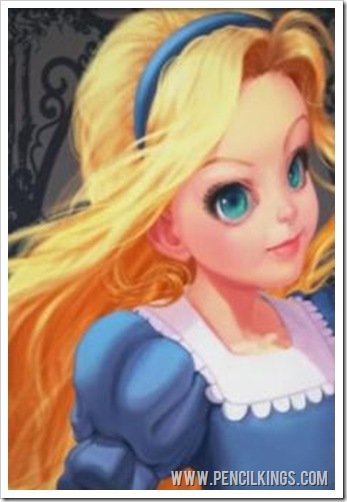
Take a look at our finished painting:
Reading Between the Lines
For the next part of our line art tutorial, you’ll be adding line art to your finished sketch. Because this is quite a long process, Sycra will be showing you how to do this using time-lapse video to speed everything up.
It’s a good idea to set aside some time for this and work meticulously – after all, you’ve now come to one of the most important parts of your Alice painting.
Use the finished sketch as your guide, but also feel free to use your reference photos to add any further details, such as the folds and details in the clothing.
If you’re ready, let’s get to it! Take up that tablet and let’s get started on this line art tutorial!
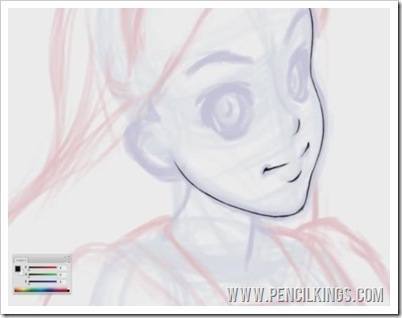
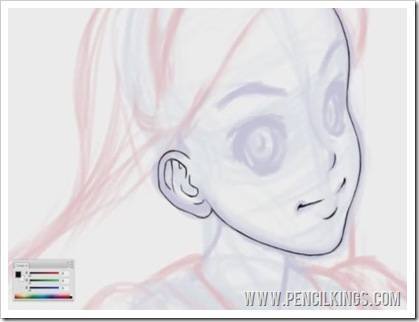
Line art Tutorial: Adding Clear Lines to Alice’s Face
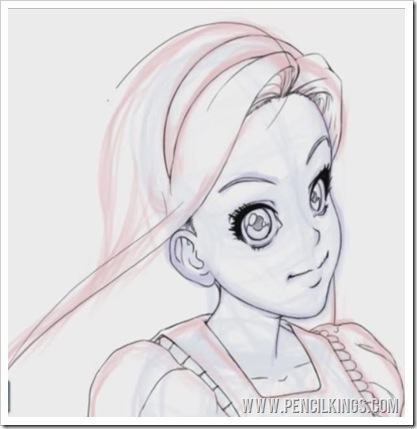
To start with, Sycra is going to start with Alice’s face, making the lines clearer as he sketches in the outline.
Use your reference photos to help you when drawing areas such as the ears.
Alternatively, go back to Sycra’s video series on facial features to refresh your memory.
You can work in whichever order you choose, but notice how Sycra is working his way around Alice’s face.
First, he draws the cheek and jaw line, then the nose and mouth followed by the ears before moving on to the hairline.
Throughout this line art tutorial, remember to keep moving your image around, zooming in and out continuously to give you a clearer idea of how your line art drawing is working as a whole.
Adding Eyelashes
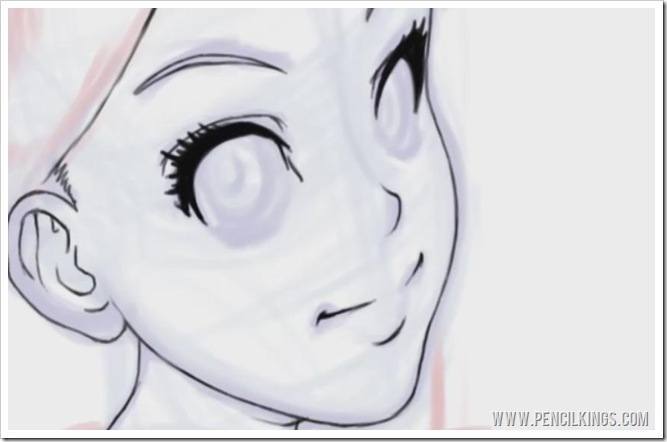
When adding the eyelashes in this line art tutorial, you can use a thicker brush to fill in the top eyelid, before drawing in some thick eyelashes.
Remember, in female characters, these are always a lot more prominent.
Looking Through Alice’s Eyes

When adding line art for Alice’s eyes, you might find it helpful to refer to Anime or Manga illustrations – this will give you an idea of the highly stylized approach we’re trying to achieve.
Although these may not look much like real eyes, they can still convey emotion and create a great focal point for our finished painting.
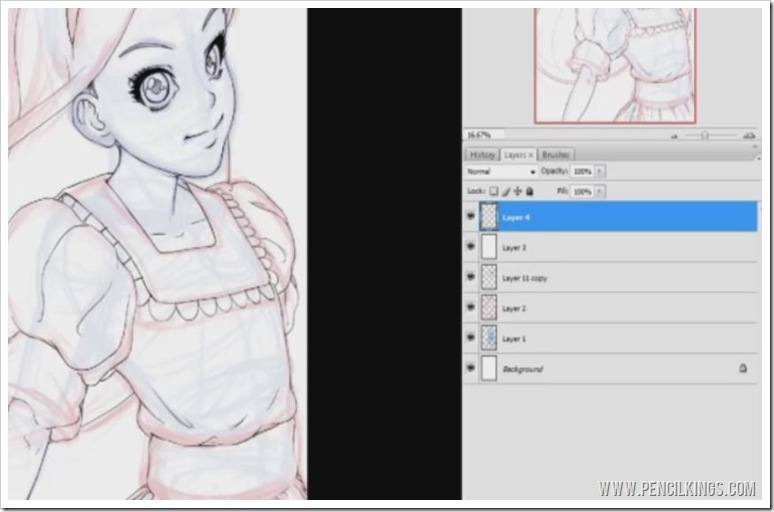
Adding Detail to the Dress
Look at your reference photos when adding details to Alice’s dress – note the folds on her sleeve and the trim around the neckline.
If, when going through this line art tutorial, you feel that some of the guidelines aren’t exactly as you want, feel free to change them.
Remember, you can easily erase any mistakes and carry on.
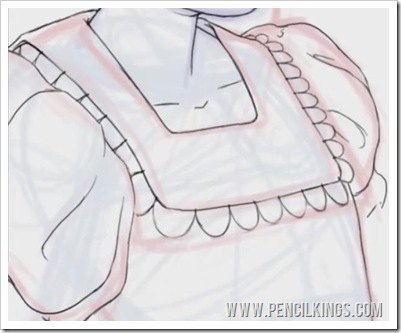
Giving Alice Wrinkles
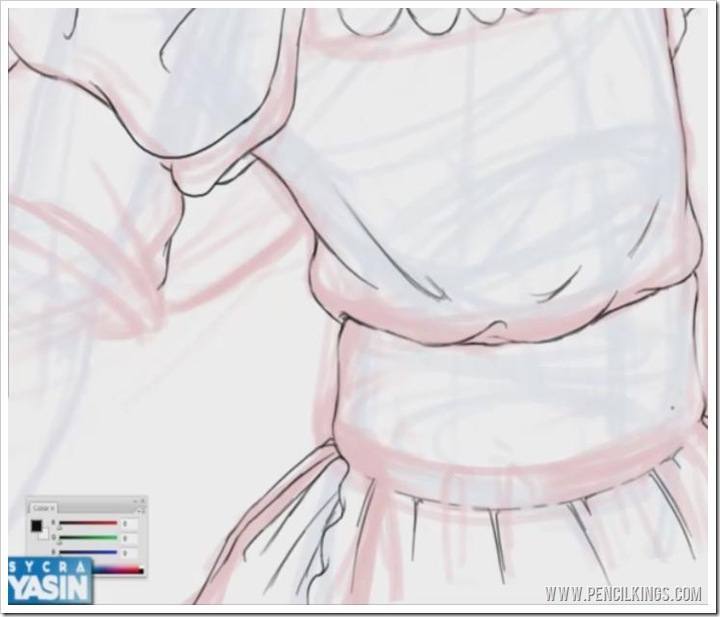
She may only be seven-and-a-half years old, but Alice sure has a lot of wrinkles – in her dress! Using your reference photos again, add these to your line art layer – they’ll give your painting real depth and visual interest.
Remember to keep hitting the ‘F’ key twice to easily move around your drawing – this comes in really handy when working on detailed areas such as the clothing.

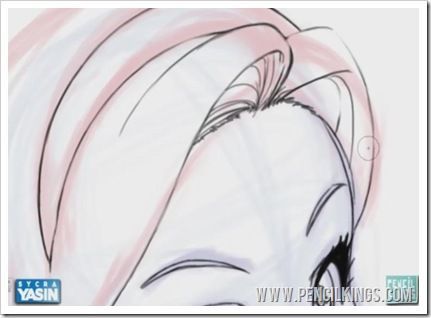
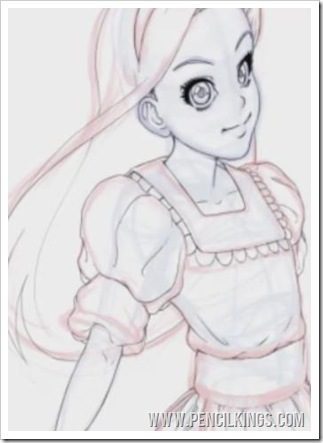
Hair-raising Details
Once he’s added detail to Alice’s clothing, Sycra then moves on to the hair.
However, he’s only going to add a few details here, such as the hair band and a few strands at the front – he’s going to use a different layer for the rest of Alice’s flowing locks.
This allows him to use a different technique when working on the rest of the hair – something you’ll soon discover!
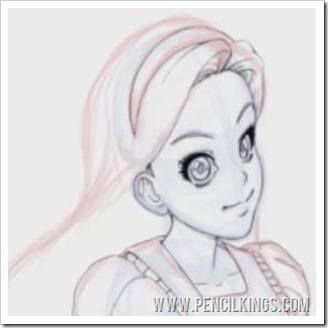
Notice how the drawing in this area is much more defined – this helps create interest and draws the viewer’s eyes to this part of the painting.
Feel free to add little details here and there as you work through this line art tutorial.
For example, after finishing the details of the hair, Sycra decides to re-draw the one eyebrow and adds some more lines to the eye area.
Just keep looking around your drawing and tweaking any areas until you’re happy with your drawing.
Creating a new Hair Layer
Once you’ve finished drawing, zoom out so you can see how the composition looks as a whole.
It’s looking pretty good, so all you need to do now is create a new layer for the hair.
We do this because you’re going to be using a different drawing technique here in this line art tutorial.
Also, parts of the hair flow behind the body, so drawing this on a different layer will help us establish where those lines should fall.
Long, Sweeping Lines
The secret to drawing the hair is using long, sweeping lines rather than the feathering technique you used to draw the rest of the body.
Once you’ve created a new layer for the hair, practice loosening up your drawing arm, ready to draw some swooshing curves for the hair – remember the scribbling exercises you did at the beginning of this line art tutorial?
Take as many attempts as you like – it’s important to remember that you might not get it right first time using this method.
When working this way, it’s a good idea to have your fingers poised over the Ctrl +Z keys, as this will mean you can easily undo any lines that aren’t quite right.

Once you’ve drawn a line that looks good, simply erase any extra lines you don’t need.
Use the same technique for the other lines of the hair – practice the movement first without actually drawing a line, then go for it once you’re ready.
Notice how Sycra has used one long, flowing curved line for the hair which falls behind Alice’s back.
You don’t have to be so precise when drawing hair – as long as the line flows nicely, it’ll work.
It’s not like drawing the rest of the body, where you have to consider proportions and details.
Let’s Give That Hair Some Flair!
To add the finishing touches to this line art tutorial and give Alice’s hair some flair, you need to create another new layer and then use this to finish your line art drawing – this is because you have some areas of hair that flow behind the others.
For example, the hair flowing from the top of Alice’s head might take you a few attempts to master and you need to be able to do this without affecting the rest of your drawing.
You could just use Photoshop’s Pen Tool to do this, but Sycra prefers to go freestyle instead and sketch in some lines which are full of life.
Have fun with it! Just keep going until you’re happy with the result. When creating these long, sweeping lines, its’ a good idea to zoom in and check for any areas where the lines are overlapping – you can then simply touch these up using your Eraser Tool.
Merging Your Layers Down
Once you’ve finished drawing the hair, merge these layers down so that you’re left with just one hair layer.
To do this, go to your Layers Palette, select the top hair layer and then select ‘Merge Down’ from the menu. Now, you’ll see how all these separate layers now become one.
The only thing left to do now in this line art tutorial is to create a new layer to add some final finishing touches to the hair, such as the area at the bottom where it forms into clumps.
Eventually, you should end up with a finished line art drawing that looks something like this.
Now, we’re ready to move on to the final stage of our Alice portrait, where you’ll learn a whole load of useful techniques from Sycra that will help you in every aspect of your artistic career!
In the next line art tutorial, you’ll discover how to color in your line art quickly and easily, before moving on to learning the secrets of shading from a master of digital painting. We hope you had fun following this series and that you’ve learned a lot.
Please feel free to leave us some feedback and tell us how you got on!
Return to the Comic Penciling Lessons Page