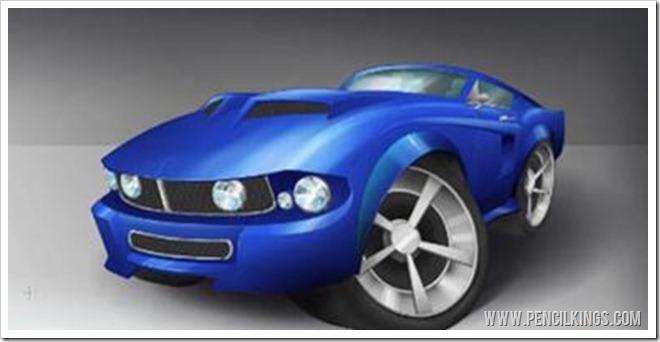
Here’s a sneak preview of the finished painting in this series
Welcome to our next lesson on how to create classic car drawings! By now, you should already have a series of thumbnail sketches where you’ve tried out different ideas to see which one works best.
Sure, these thumbnails may not look too pretty, but they’re an essential part of creating your finished piece. And, the information you pick up here will save you a lot of time once you start on your finished sketch!
So, if you’re ready, let’s start the engine and set out on the road as we learn all about using proportions and perspective.
Choosing a Favorite Thumbnail Sketch
Try and spend between five and 10 minutes tops on each thumbnail sketch. Believe it or not, these quick little drawings will prove invaluable once you begin work on the finished lineart for your classic car drawings.
Rendering can easily take more than six hours, so correcting mistakes in these early stages will certainly save you a whole lot of time later on.
Ask yourself: “Does it look cool? Does it look like a 1967 Mustang?”
All these questions will help you make decisions about your thumbnail sketch and choose your favorite design to work with.
Using Reference Photos to Make a Final Decision
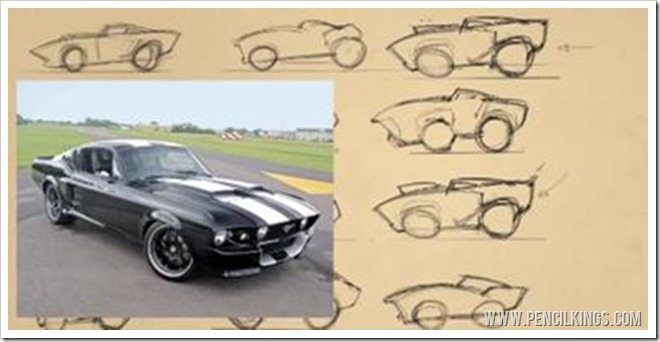
It’s decision time! When choosing her favorite thumbnail sketch, April checks her reference photos to see whether the design she likes best still resembles a 1967 Mustang.
Here, you can see how she decides to go with the sketch at the top, where she’s taken another sketch and modified some elements, including the spoiler and hood.
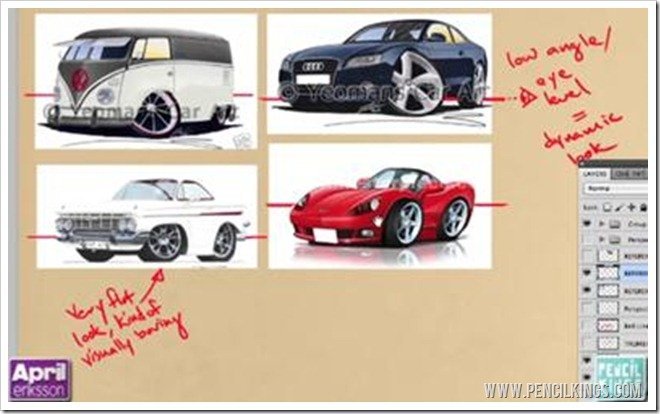
Choosing the Right Angle
Once you’ve chosen your favorite thumbnail, you need to think about the best angle to draw your Mustang from.
Looking at her reference photos, April decides she prefers the two images on the right where the eye level and angle is low to create a dynamic look.
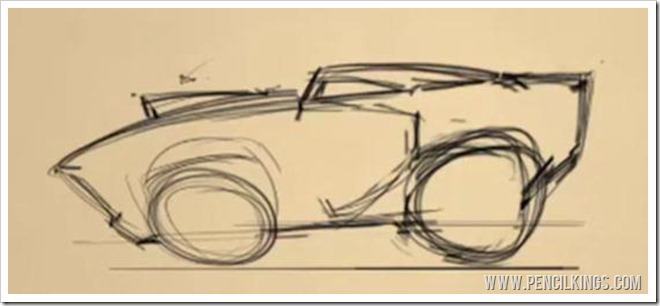
Roughing out Your Initial Sketch
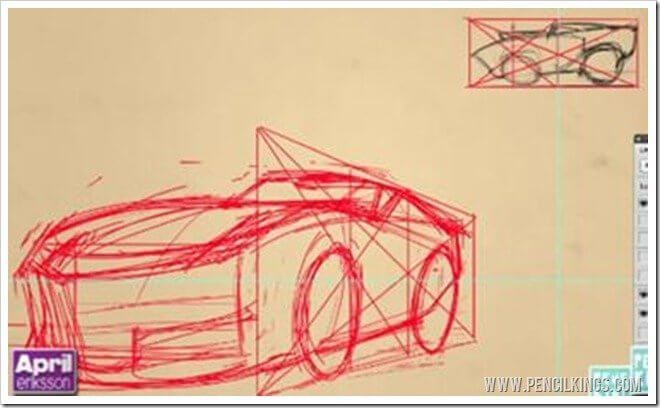
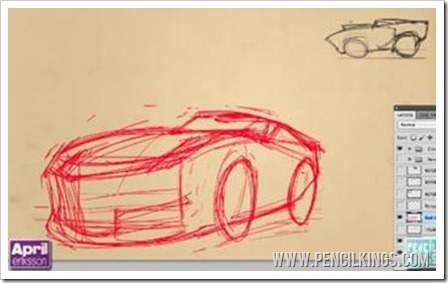
Keeping her original thumbnail in the top right, April begins roughing out her initial sketch using the information gathered from her reference photos.
Choose a bright red color to draw with and begin sketching out your design.
Don’t sweat it if this looks rough – it’s just so you can get a better idea of how your drawing will look.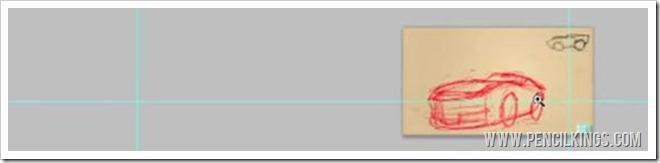
Vanishing Points and Perspective
When working on your initial sketch, it’s worth taking some time out to learn about vanishing points and perspective.
First of all, go to View > Show Rulers and then drag some guidelines down from the top and side just like in this video.
If you’re working on a Mac, you can hit Command + H to hide these lines and if you’re on a PC, it’s Ctrl + ;
The horizon line is also known as the eye level and the vanishing point is where objects seen in perspective disappear into the horizon.
Transforming Your Thumbnail Sketch into 3D
Once you’ve placed your horizon line and vanishing points, the next step for great classic car drawings is to transform your thumbnail sketch into a 3D drawing.
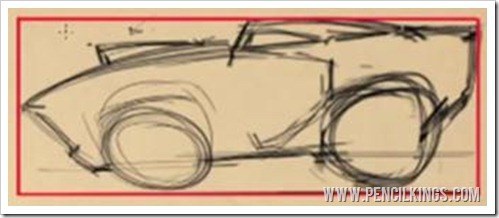
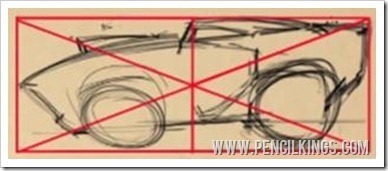
To do this, draw a box around your thumbnail sketch using Shift to create straight lines.
Then, draw lines that meet with the top, bottom and both ends of your car.
Then, to find the halfway point, create a diagonal line running through this box, draw one end point in the corner, hold down Shift and draw another end point.
This should now create a diagonal line running through the center of your box and the halfway point is where these lines intersect.
Applying Perspective to Your Initial Sketch
Once you’ve done this, you can then apply the same process to your initial sketch. Draw a grid that follows the lines of perspective and then draw diagonal lines from each corner to find the midway point.
You should now find that this makes it easier to work out where everything should be in your initial sketch. Learning about perspective is one of the most important lessons you can pick up as an artist and it will help you when drawing just about anything – not just for classic car drawings!
In the next lesson on how to draw a muscle car, you’ll be finishing off your initial sketch and adding some more details before starting work on the lineart.
We hope you’ve had fun and learned a lot from this article on classic car drawings.
Leave a comment below to let us know how you’re progressing!
Go to the Car Caricature Lineart Lessons Page