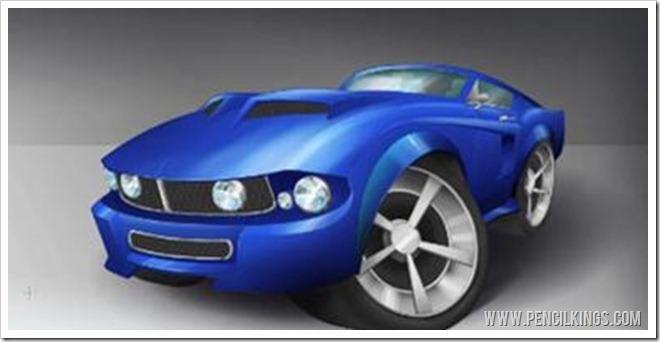
Let’s speed forwards to the finished painting in this series
In our previous lesson on how to draw a car, you learned how to add darker tonal values to your digital painting of a 1967 Mustang.
Now, you’re going to apply the same techniques to creating lighter tonal values. These will help give your painting depth and form and will make a great basis for rendering.
So, get those graphics tablets ready and let’s get this engine started!
Step on the gas to add Lighter Tonal Values
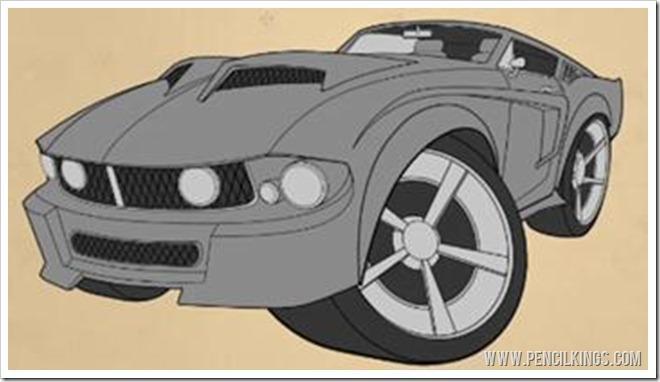
The first part of this video on how to draw a car is filmed in time-lapse. This is so you can quickly see April’s working method as she finishes off adding darker tonal values.
Notice how she continues to make use of the Lasso Tool to fill in areas and keeps zooming in and out to get an overall view of her painting.
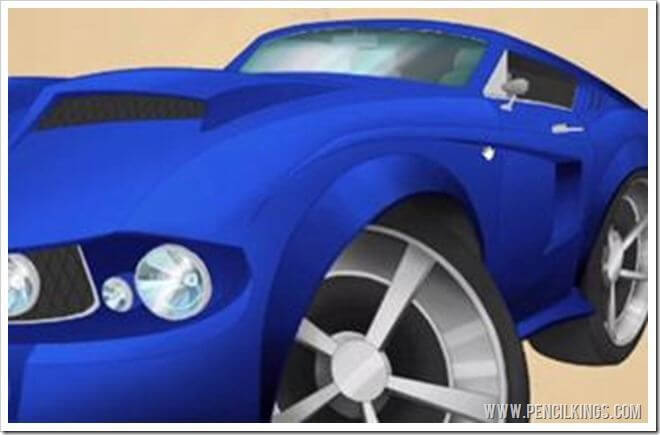
Areas of Lighter Tonal Value in Your Painting
Now that you’re ready to start adding lighter tonal values to your painting, it’s worth taking a look at your reference photos to see where these areas will be.
In this example, the areas of highlight will be the chrome trim, the wheel rims and some areas of the bodywork.
Just like with the darker areas, try to avoid going too light too fast – you’re looking for a shade of gray that’s just slightly lighter than the mid-tone used on the bodywork.
Here are the Main Takeaways from this Lesson on How to Draw a Car:

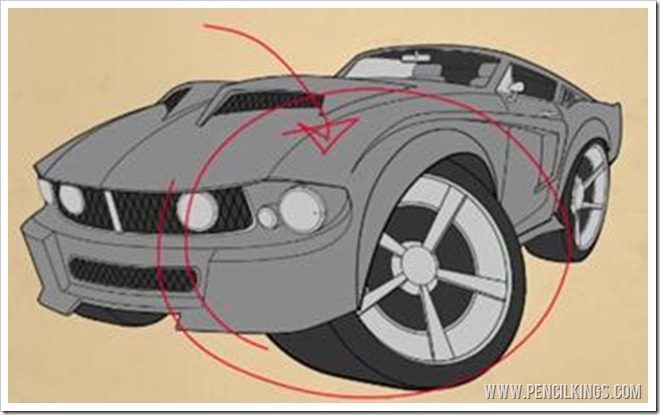
Keep Using Your Magic Wand to Fill in Areas Quickly
Keep using your Magic Wand Tool to fill in areas quickly, but remember to make the selection from your lineart layer and then go back to your color layer to apply the fill. Expand your selection by 2 pixels if necessary to fill the area neatly.

Hold Down Shift to Select Multiple Areas
When working on detailed areas such as the wheels of your 1967 Mustang, holding down Shift while using your Magic Wand Tool will enable you to select multiple areas quickly.
You can also then use the Lasso Tool to refine your selection.
Ready for Rendering
Once you’ve finished adding all your darker and lighter tonal values, you’re ready to start rendering!
First of all, establish where the light source is coming from by using your reference photos. You want the light to be hitting prominent parts of your Mustang so these elements really pop in your painting.
When painting vehicles and learning how to draw a cartoon car, the focal point will usually be the part of the car nearest to the viewer – in this case, the hood and front wheel.
This is the part of your painting which will require the most detailed work.
Separate Layers for Darks and Lights
To finish off this lesson on how to draw a car, you’ll need to create two new layers for rendering – one for darks and the other for lights.
Then, create a large, soft brush by going into your Brush settings and turning the Hardness down to zero percent.
Then, tick the Transfer box, set this to Pen Pressure and make sure your Spacing is also set to a low figure.
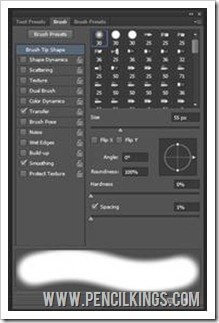
You can also tick the Smoothing box to create and even softer brush.
Once you’ve done this, you’re ready to start applying smooth, graduated tones to your painting which will help you create some cool effects for your final render.
In the next lesson on how to draw a car, you’ll be learning all about rendering your 1967 Mustang and how you can use these grayscale tonal values to create rich areas of color to make your painting pop.
We hope you’re getting a lot from these lessons and we’re always keen to know how you’re getting on.
Don’t be a stranger – leave us a comment in the box below!
Return to the Car Caricature Color Lessons Page